ReSTNSX with HCX
How can ReSTNSX help me with the migration with HCX
1668 Words // ReadTime 7 Minutes, 34 Seconds
2025-05-20 18:00 +0200
Introduction
I have already written about my experiences with HCX in the past and as brilliant as the tool is for the migration of different workloads, the rework with the distributed firewall can be painful. Because what HCX can’t do is move firewall rules or security objects. Fortunately, there is a solution for this: ReSTNSX.
But what exactly is ReSTNSX? ReSTNSX describes itself as follows: The ReSTNSX platform simplifies consumption of VMware’s NSX API to increase visibility and reduce the risk of errors. Our mission is to enable administrators to easily configure and operate NSX with a straightforward and intuitive user experience. We will see in this post whether it is really that simple.
A quick note about transparency: I was provided with a free demo license, but I am not receiving any money and this does not influence my opinion. In this post, I’ll walk you through how RESTNSX complements HCX, especially when migrating applications with strict security policies or complex network requirements.
Why Combine HCX with ReSTNSX?
While HCX handles the heavy lifting of vMotion, replication, and network extension, it doesn’t touch NSX security rules or segment tagging. That’s where RESTNSX comes in. ReSTNSX can access various systems via API, including Checkpoint and Palo Alto firewalls (which are not the focus of this article), as well as external resources such as Active Directory and SMTP servers. The architecture is relatively simple: there is a Cloud Control OVA, and that’s it. It really is that simple.
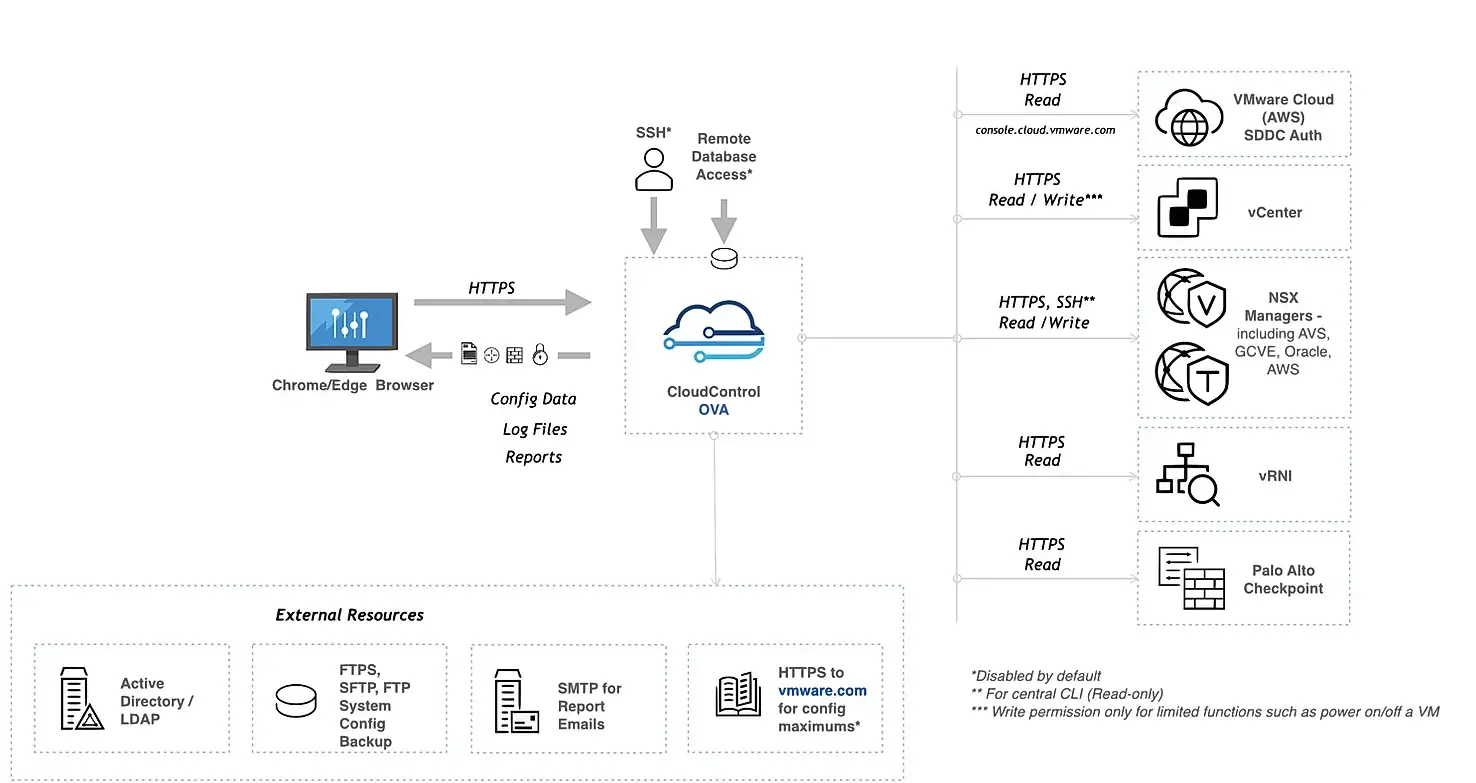
ReSTNSX Architecture taken from ReSTNSX Website (click to enlarge)
Some key benefits:
- Automatically replicate security policies to the destination environment
- Tag migrated VMs for policy-based firewall rules
- Clean up or reassign segments and groups after cutover
- Automate post-migration tasks (e.g., updating DFW rules, creating new groups)
Getting started
To get started, you first need to deploy the OVA and register the product. The process is pretty straightforward, so I won’t go into detail here. Once the CloudControl OVA has been successfully deployed and registered, you need to register the data sources. To do this, go to Administration - Data Sources.
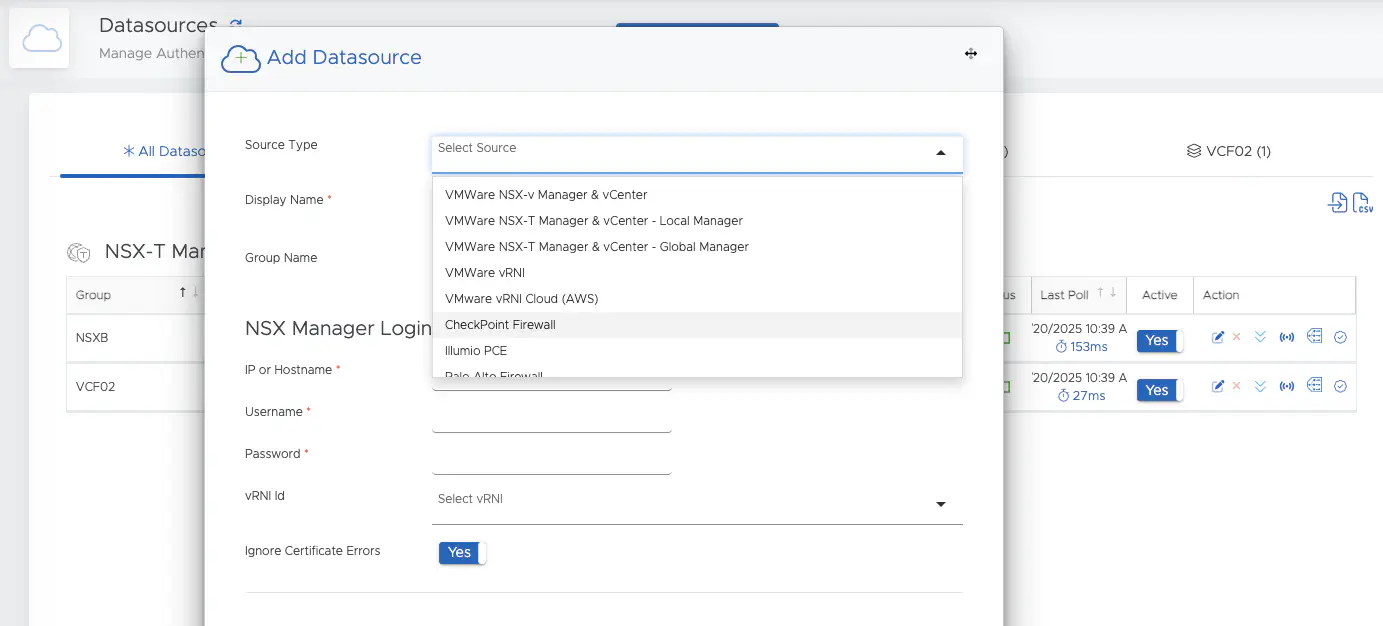
Datasources in ReSTNSX (click to enlarge)
As you can see here, I have set up two NSX environments as data sources. NSXB is a pure NSX lab, and VCF02 is my VCF stretched cluster, which I have already discussed in my blog.

Datasources in ReSTNSX (click to enlarge)
Then I got this test setup ready:
RESTNSX & HCX Test Scenario
The migration scenario involves moving workloads from a source environment named NSXB to a destination environment VCF02. The VCF02 NSX environment initially contains no custom firewall rules, tags, or groups—only the default settings provided by NSX.
Initial Environment (NSXB)
In the source NSXB environment, we have the following setup:
- Tag:
dfg_alpine - Security Group:
dfg_all_Alpine - Tagged VMs:
Alpine1,Alpine2,Alpine3, andAlpine4
A custom firewall policy named ReSTNSX-Policy is configured as follows:
-
Allow ICMP to Alpine VMs
Allow all ICMP traffic from any source to all VMs in the groupdfg_all_Alpine.
Applied to: All distributed firewall (DFW) VMs -
Allow HTTP and HTTPS to WAN
Allow HTTP and HTTPS traffic originating from VMs in thedfg_all_Alpinegroup to any external (non-RFC1918) destination (Internet).
Applied to:dfg_all_Alpine -
Allow SSH to Alpine VMs
Allow SSH traffic (TCP port 22) from any source to all VMs in thedfg_all_Alpinegroup.
Applied to:dfg_all_Alpine -
Allow iPerf3 Between Alpine VMs
Allow iPerf3 traffic (TCP port 5201) between all VMs within thedfg_all_Alpinegroup.
Applied to:dfg_all_Alpine -
Allow DNS from Alpine VMs
Allow DNS traffic (TCP and UDP port 53) from all VMs in thedfg_all_Alpinegroup to any destination.
Applied to:dfg_all_Alpine -
Drop All from Alpine VMs
Drop all other traffic originating from the VMs within thedfg_all_Alpinegroup to any destination.
Applied to: All distributed firewall (DFW) VMs

ReSTNSX Firewall policy (click to enlarge)
Migration of the firewall rules and VMs
I am migrating the workloads (Alpine3-4) seamlessly to the VCF02 environment using VMware HCX.
Of course, the VMs stop communicating after the migration because there are no firewall rules in the target environment yet, except for the default Layer 3, which is set to drop all on my system.
There are several ways to migrate my firewall ruleset to the target environment. I could import a ruleset using bulk provisioning and a CSV file, but in my opinion, the charm of this solution lies in the Policy Engine. Using the Policy Engine, which can be found under Tools in the menu, you can easily create a sync task that can synchronize a wide variety of tasks on a cyclical basis.
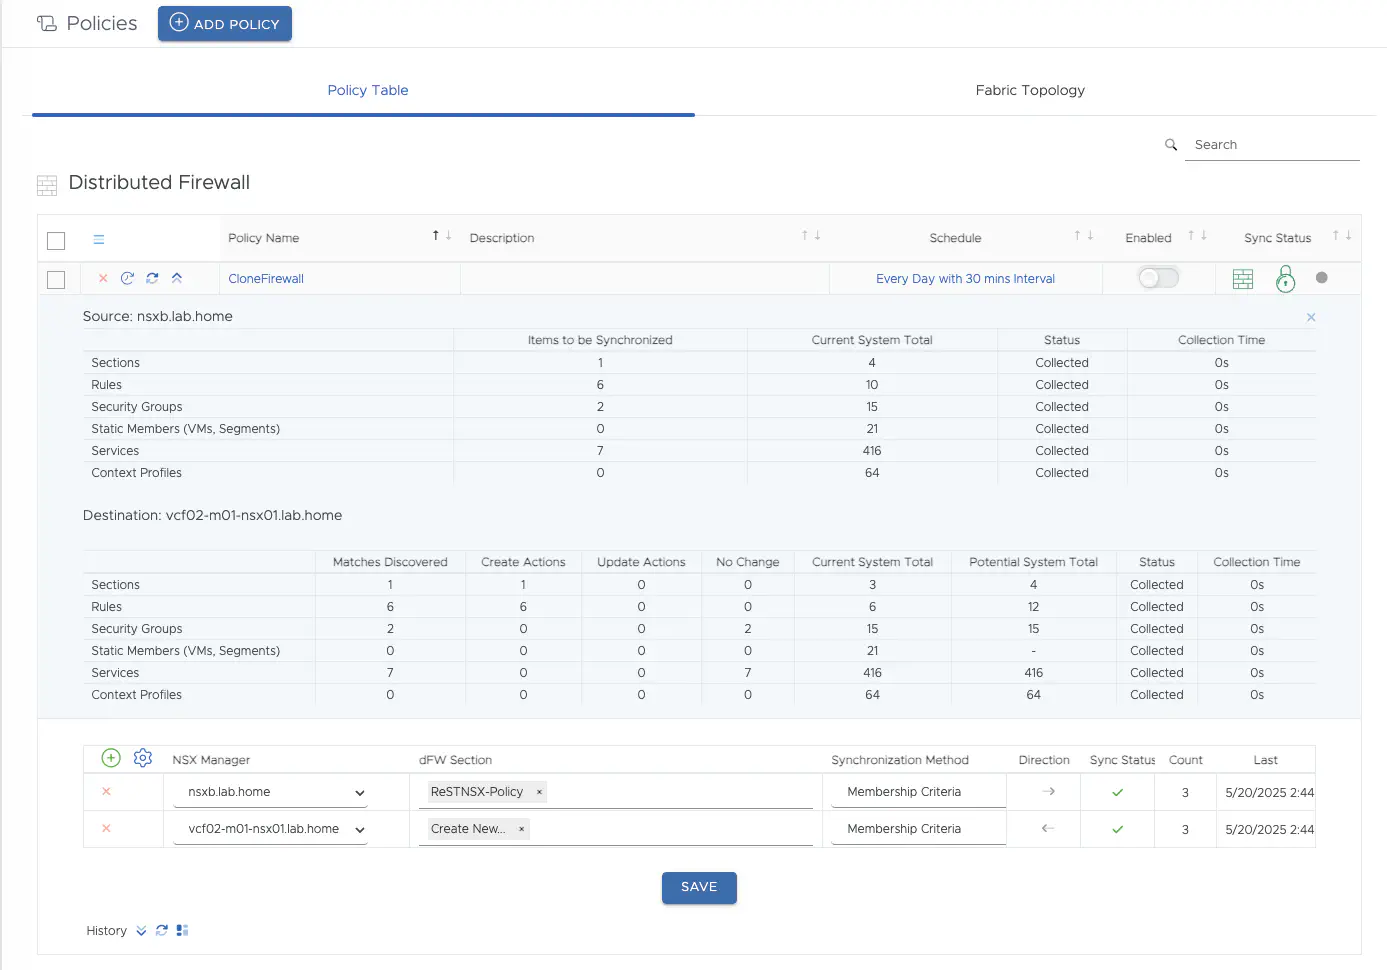
Policy Engine in ReSTNSX (click to enlarge)
The screenshot shows my finished policy. It is relatively simple. I have selected to create a policy of type dFW Sections. By default, synchronization runs every 30 minutes when the policy is enabled. Under NSX Manager, I specify my source and target NSX Manager, and in the dFW Section field, I set the source policy. In my example, it is the previously created ReSTNSX policy from my NSXB environment. My destination is the VCF02 environment. Under Synchronization Method, I can specify various options for what exactly should be synchronized. Direction specifies the source and destination systems; a bi-directional sync is also possible. Further up in the screenshot, you can see the result of the preview sync. As you can see, sections, rules, security groups, static members, services, and context profiles are synchronized—that’s quite a lot. But first, a quick word about the synchronization method, as this has an impact on the actual implementation.
There are 4 synchronization options: Effective Members, Membership Criteria, Membership Criteria (MAT Mode), and Effective Members + Membership Criteria.
-
Effective Members: This mode ensures that the realized members from the source group are written to the new group, which means that the new group receives a static IP assignment for its members. In this case, the membership criterion is an IP, even if it was previously a dynamic group. If the source VM does not have a realized IP, it is not part of the new group.
-
Membership Criteria: In this mode, only the criteria for how the groups receive their members are synchronized. In the case of an IP-only group, the defined IPs are simply stored as criteria. This mode allows us to obtain our dynamic groups, but if TAGs are used as criteria, they must be created in the target environment (or synchronized with HCX), otherwise the groups will remain empty.
-
Membership Criteria (MAT Mode): Only for V to T migration. Since I don’t have NSX-V in use, I couldn’t test anything here.
-
Effective Members + Membership Criteria: This is a combination of both methods. I have my dynamic TAG definition and my effective members. This can be used if you cannot synchronize TAGs and want to make sure that communication works instantly in the new environment. However, this requires post-processing steps and is not necessary in my setup.
By default, ReSTNSX creates firewall sections, rules, and object names in the target environment that are identical to those in the source environment. This behavior can be changed when creating the policy.
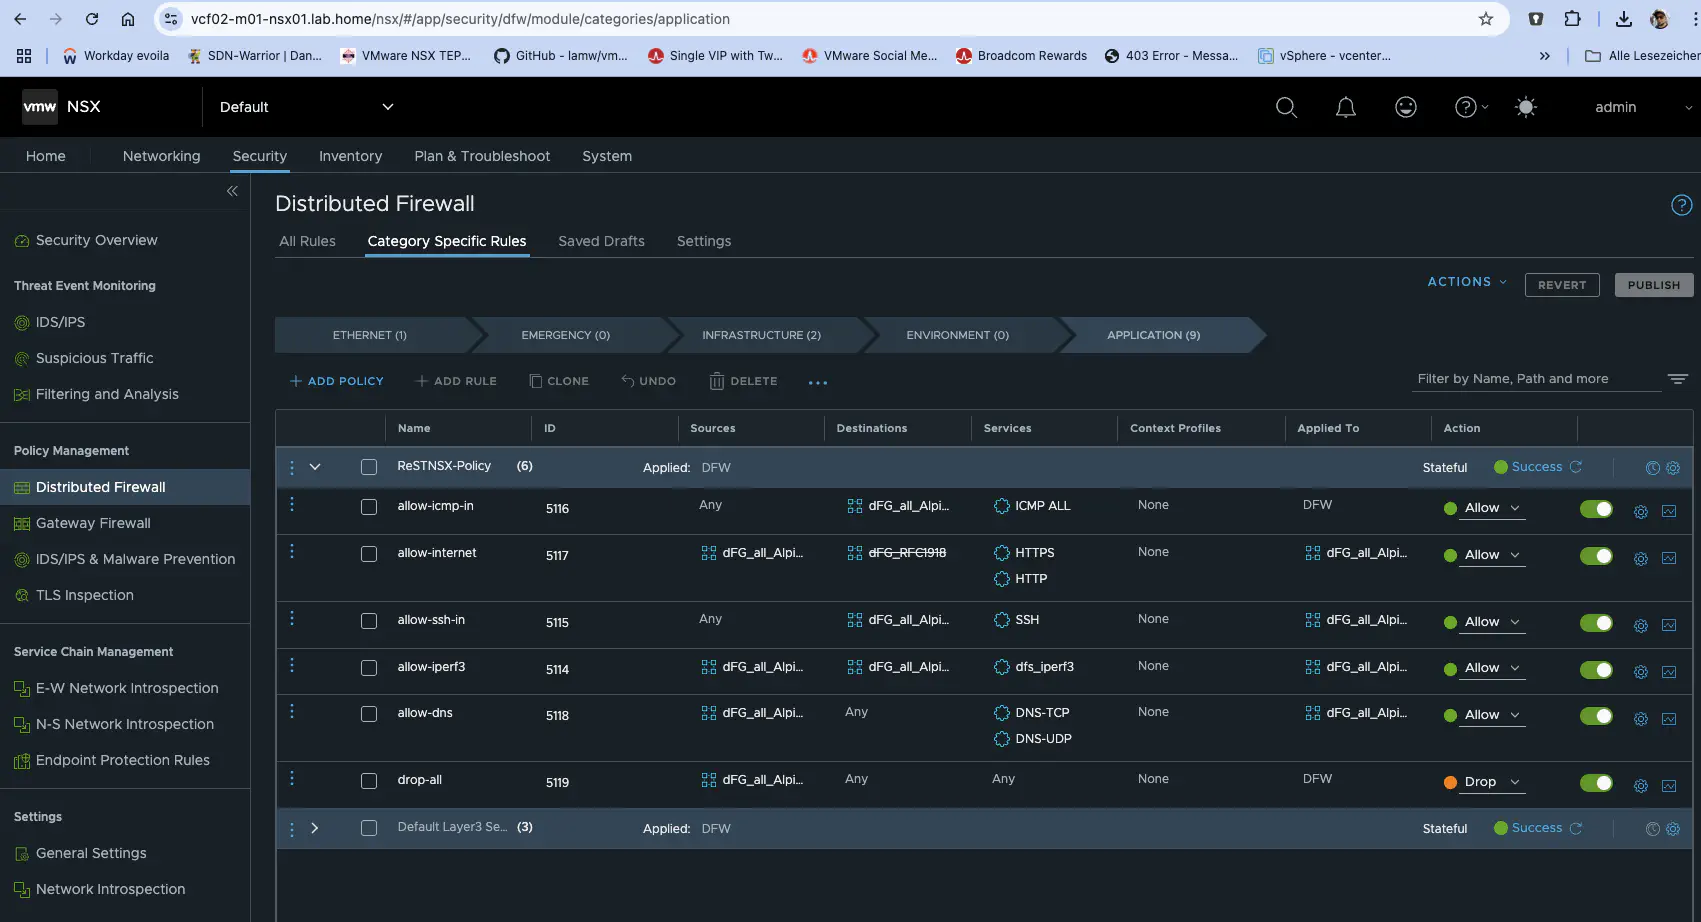
Firewall Policy in the target NSX (click to enlarge)
A policy does not have to be activated; you can also start it manually with a forced sync and use this policy as a one-time synchronization. For long migration scenarios, performing the synchronization cyclically is invaluable, especially if there are rule adjustments during the migration phase. After successful synchronization, the complete policy is available 1:1 in my VCF02 and the migrated VMs alpine 3 and 4 are automatically in the dFG_all_Alpine group, as they retained their NSX security tags during the HCX migration and the groups created by ReSTNSX use the same definitions as in the source environment.
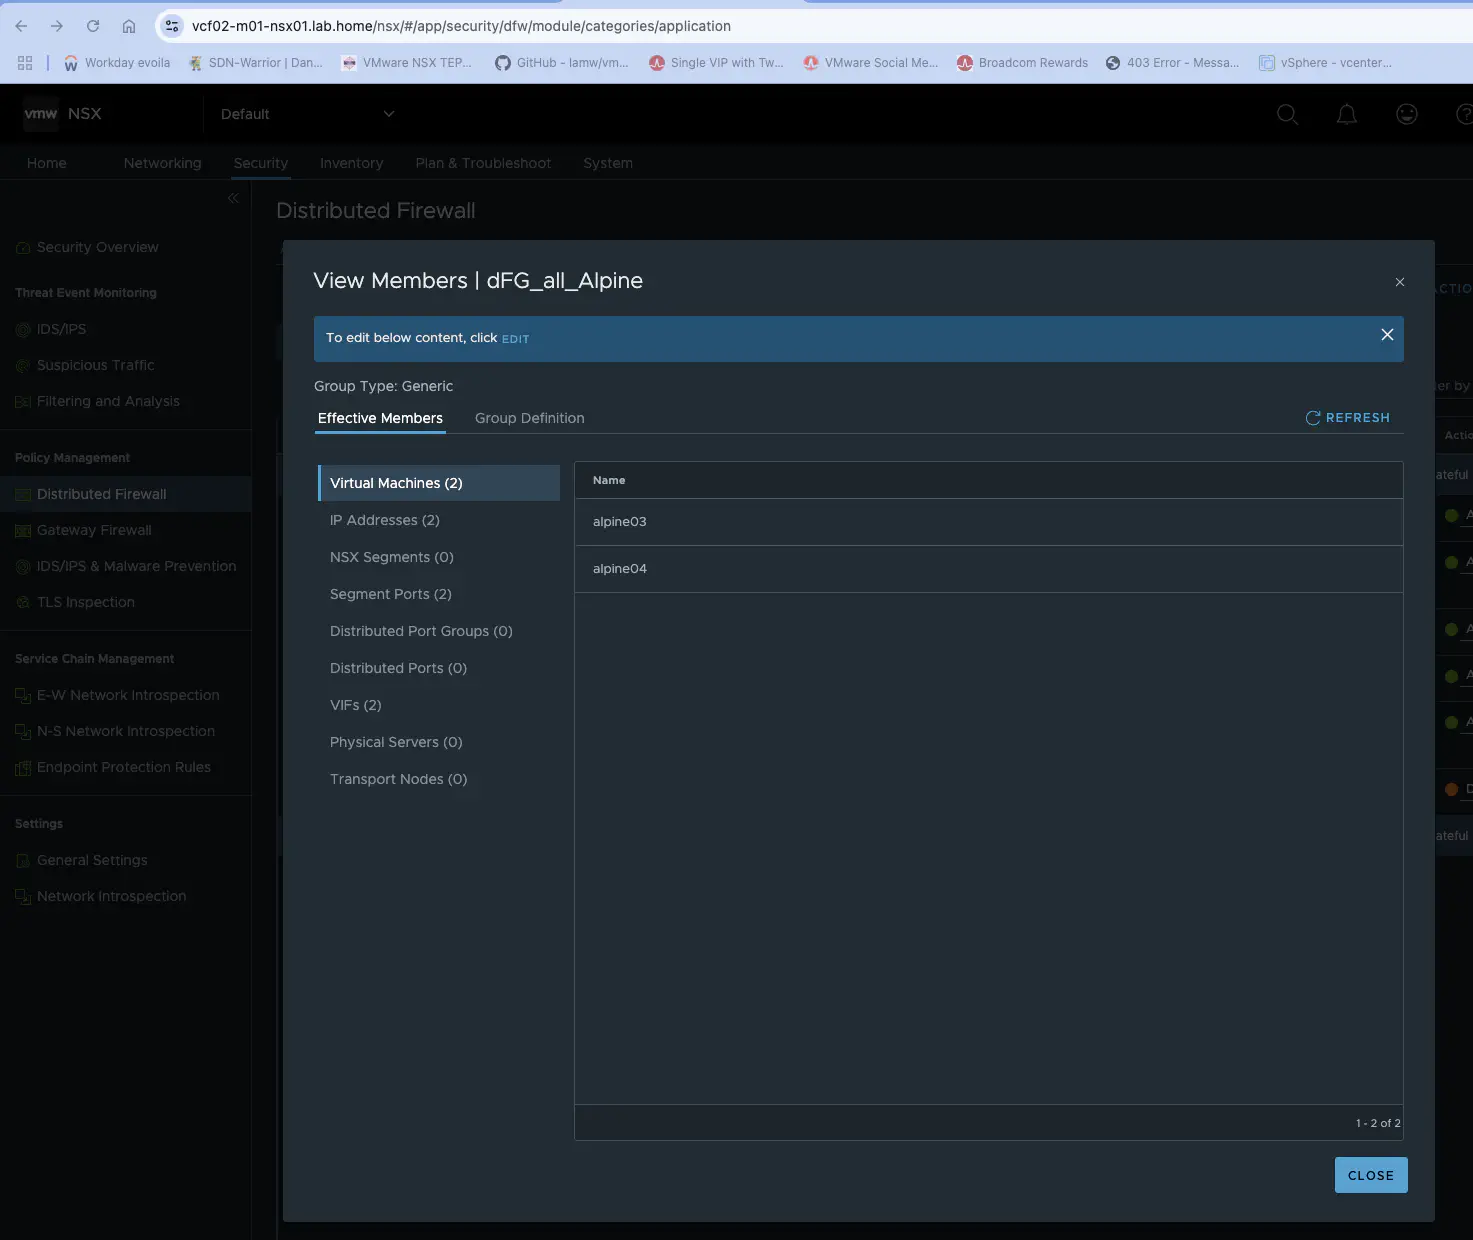
Firewall groups in the target NSX (click to enlarge)
Additional features of ReSTNSX
ReSTNSX is not just a simple migration tool, although that was certainly the first use that came to mind. It can do much more than that. ReSTNSX has a very good, customizable dashboard that provides me with long-term information about my NSX environment.
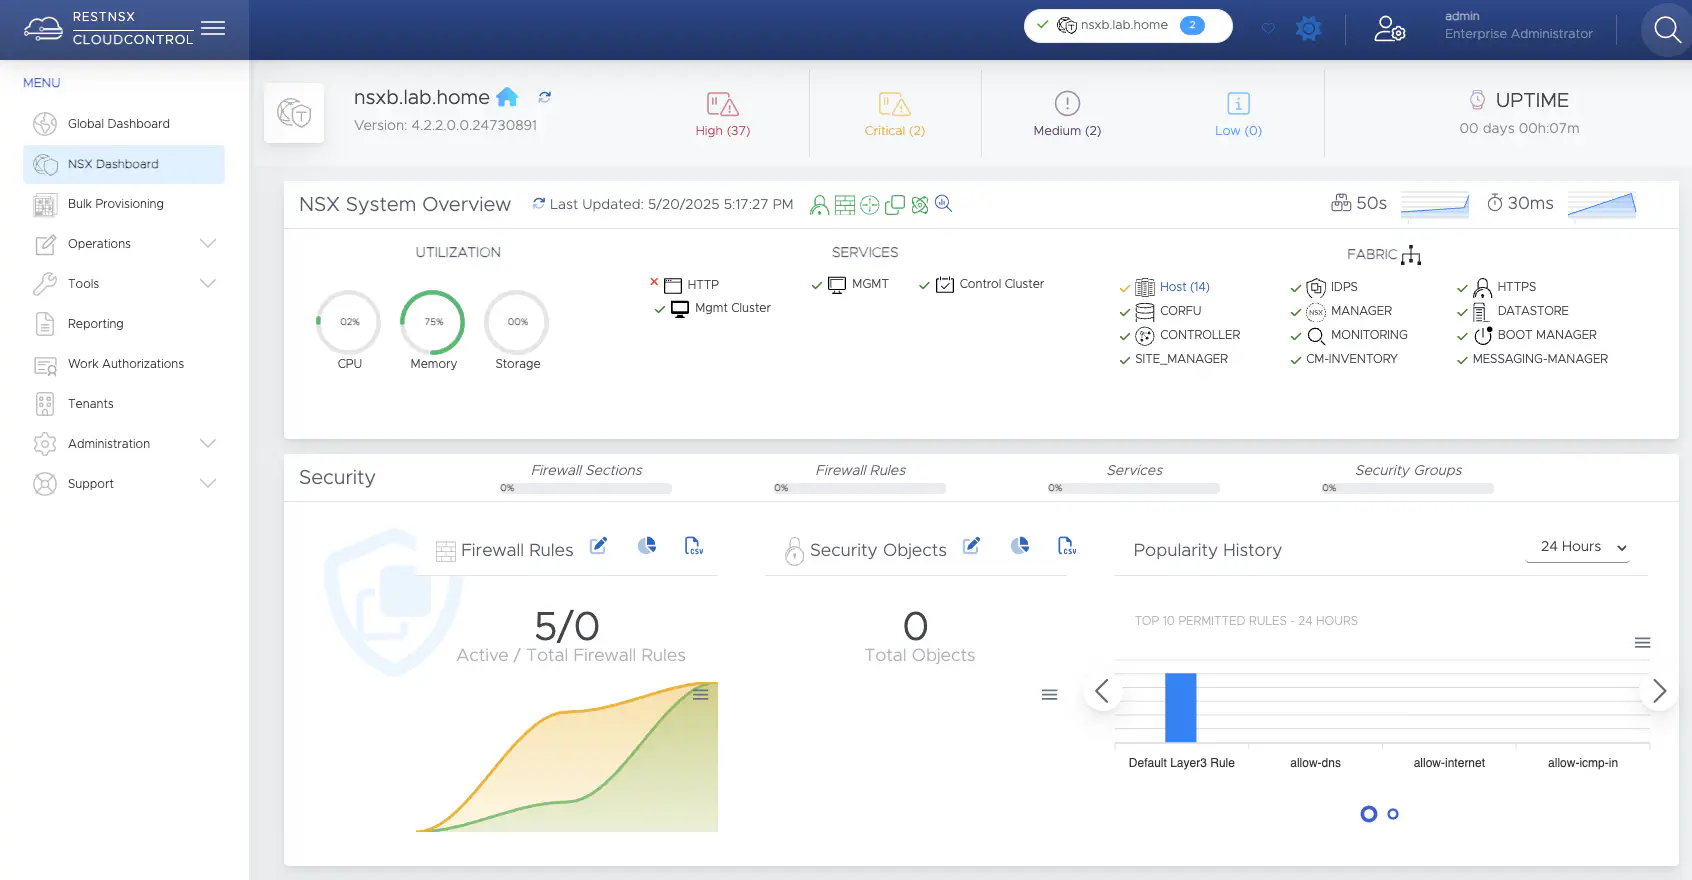
ReSTNSX Dashboard (click to enlarge)
Of course, the dashboard in my lab doesn’t show much, because I don’t have Aria Operations for Networks running, and I also shut down my labs after successful testing so as not to drive up my electricity bill even more. ReSTNSX also features a comprehensive reporting system and enables NSX documentation and auditing. Bulk Provisioning is a powerful tool for manipulating, creating, and detaching security tags, groups, firewall rules, and other items. You can even clone an entire NSX environment.
Conclusion
ReSTNSX is not just a simple migration tool, it also accelerates Day 2 operations in NSX and VCF. Combined with HCX, it has never been easier to migrate existing microsegmented workloads from one workload domain to a new workload domain or VCF instance. ReSTNSX uses APIs from vCenter and NSX and offers a centralized CLI. It also offers true multi-cloud management (VMware Cloud on AWS (VMCoAWS), Google (GCVE), Azure, Oracle, and IBM). I’m sure I’ve only scratched the surface, as some things are not so easy to test, especially when it comes to multi-cloud, but I hope I’ve been able to provide some insight into a cool tool that can make everyday life and migration tasks easier.
