VCF 9 - Migration to central VCF Operations instance
A brief guide on how to switch from a VCF9 Operations instance to a central VCF Operations instance.
2041 Words // ReadTime 9 Minutes, 16 Seconds
2025-07-07 20:00 +0200
Introduction
Where should I start? Perhaps I should describe my starting point. I deployed a nested lab with VCF9 for the VCF9 beta, so far so good. This lab came with its own VCF Operations. Now we are GA and I am lucky enough to have 256 core VCF9 licenses. I wanted to upgrade part of my hardware lab to ESX9 because I also want to test memory tiering in its final version, and that’s where my problems start. In VCF9, there are no more keys and you have to license your products via VCF Operations and vCenter. This also applies to VVF, or if you want to use ESX9 on your physical lab hardware.
Conclusion: I need a second VCF Operations and would have to split my licenses. However, this is not a good solution because my nested lab is not permanently on, which means that Lab VCF Operations is also not permanently on.
The solution: a central VCF Operations and Fleet Manager.
Let’s get started
First, I shut down my Nested VCF Operations, as well as the Cloud Proxy and Fleet Manager, because in the best case scenario, I won’t need them in my Nested Lab anymore. Since the licenses are activated online, I have until the end of this year before the next usage report is due. So, for now, nothing will be left inactive.
Then I deploy a new VCF Operations, a Fleet Manager, and a Cloud Proxy.
The actual deployment is done using standard OVAs that you download from the Broadcom portal beforehand. So far, so unspectacular. I won’t go into detail about the basic setup of the individual appliances, as this is fairly straightforward. I also won’t explain how to integrate a cloud proxy, as this is fairly self-explanatory and can be done via Operations under Administration -> Cloud Proxies.
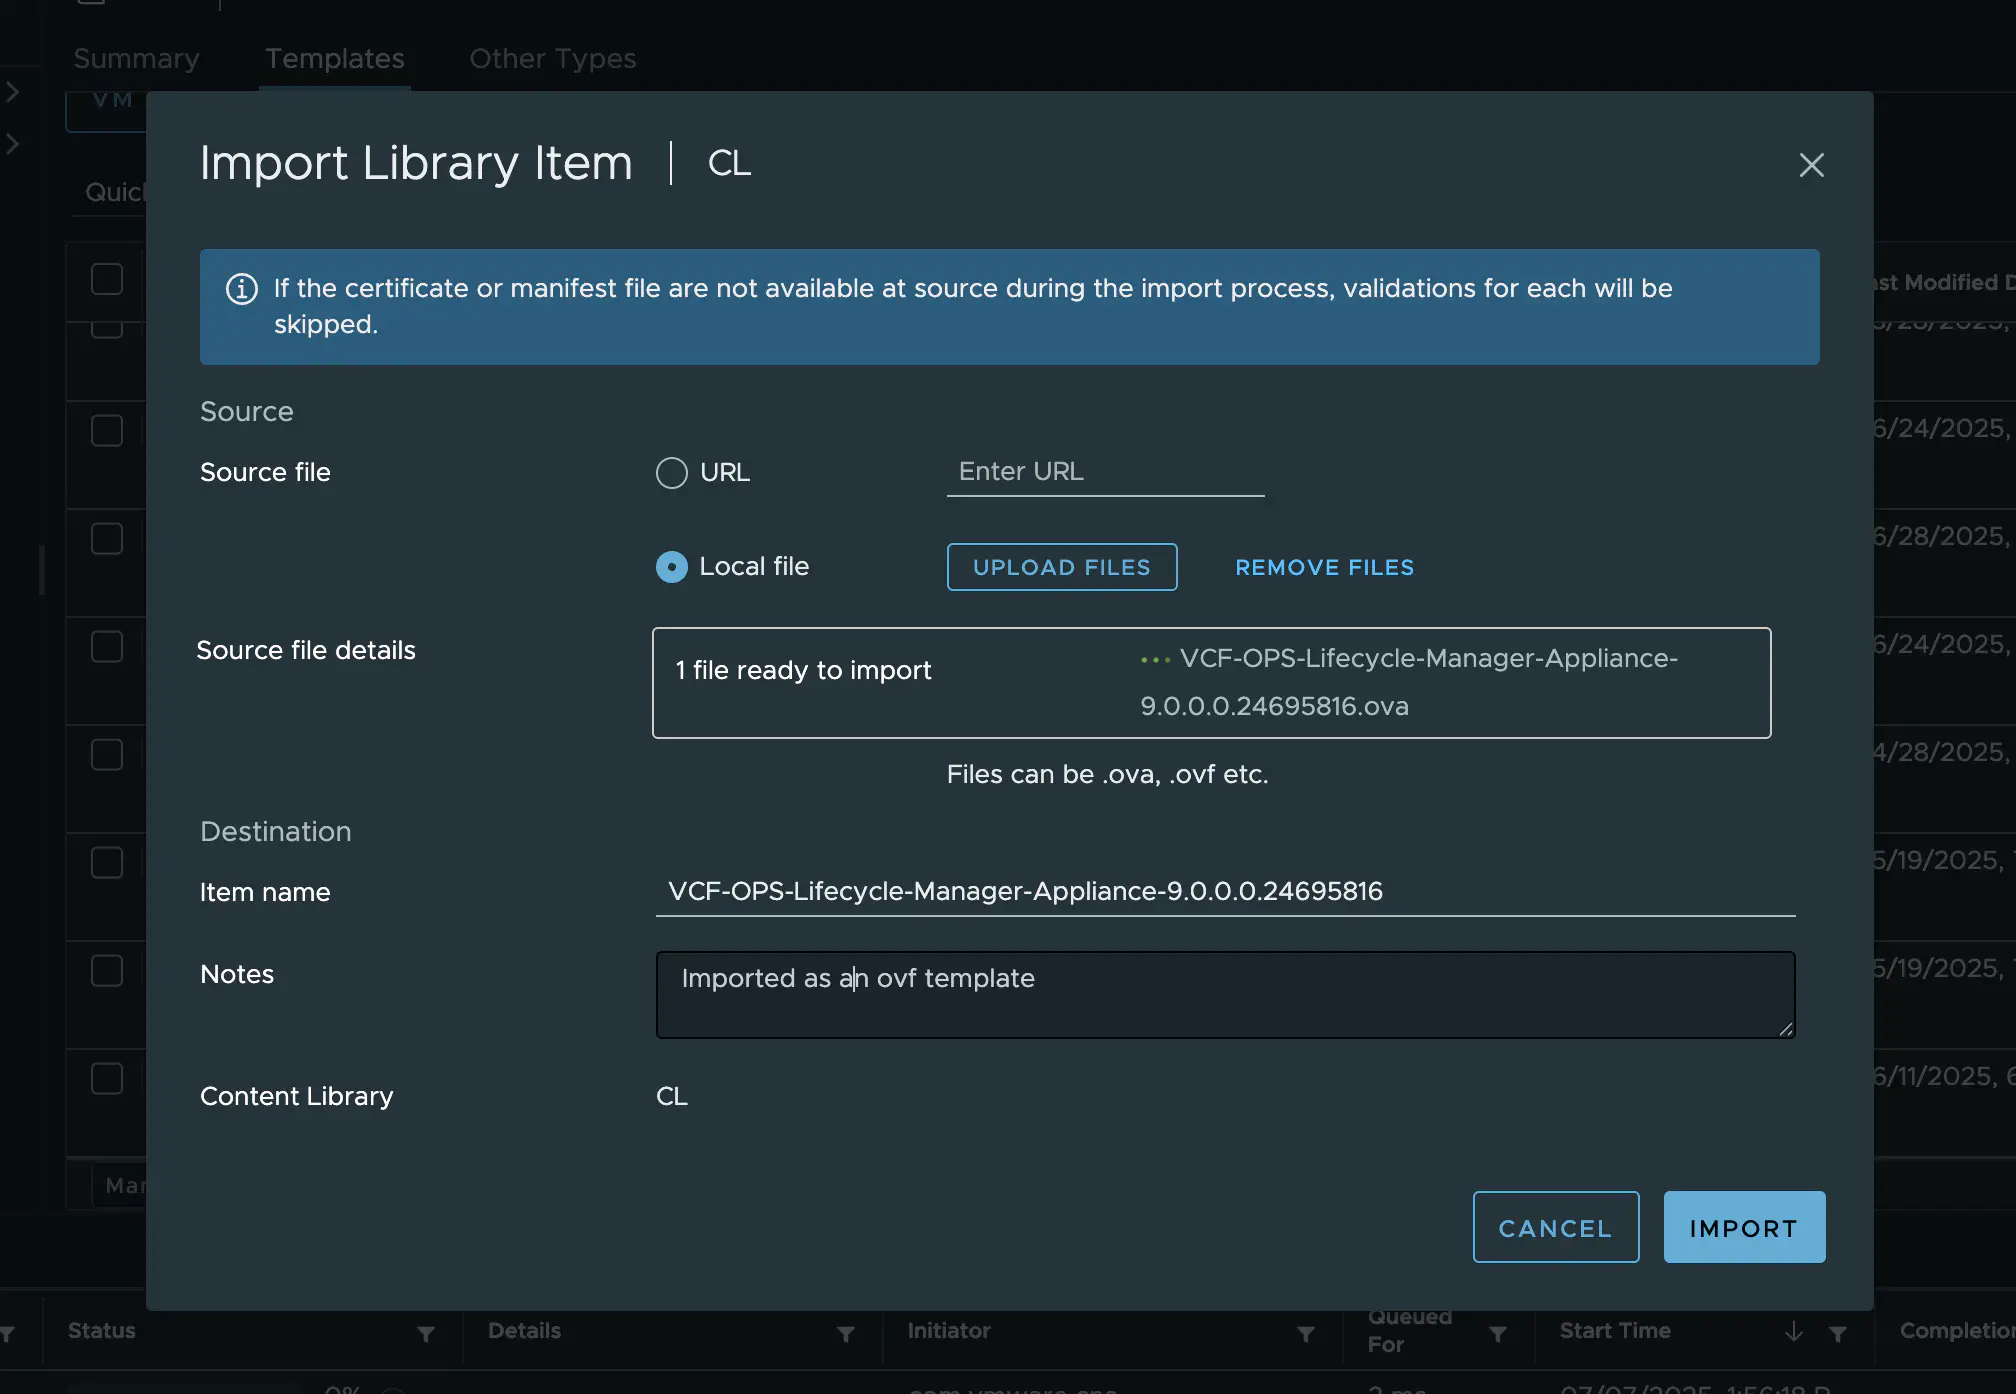
Fleet Manager OVA (click to enlarge)
Perhaps one more note: the fleet manager OVA is called VCF-OPS-Lifecycle-Manager-Appliance.
Now that we have deployed our VCF Operation and Fleet Manager, we need to bring the VCF Operation Cluster online and connect our Fleet Manager. To do this, open the Operations admin interface using the following URL: https://< VCFOPS FQDN >/admin
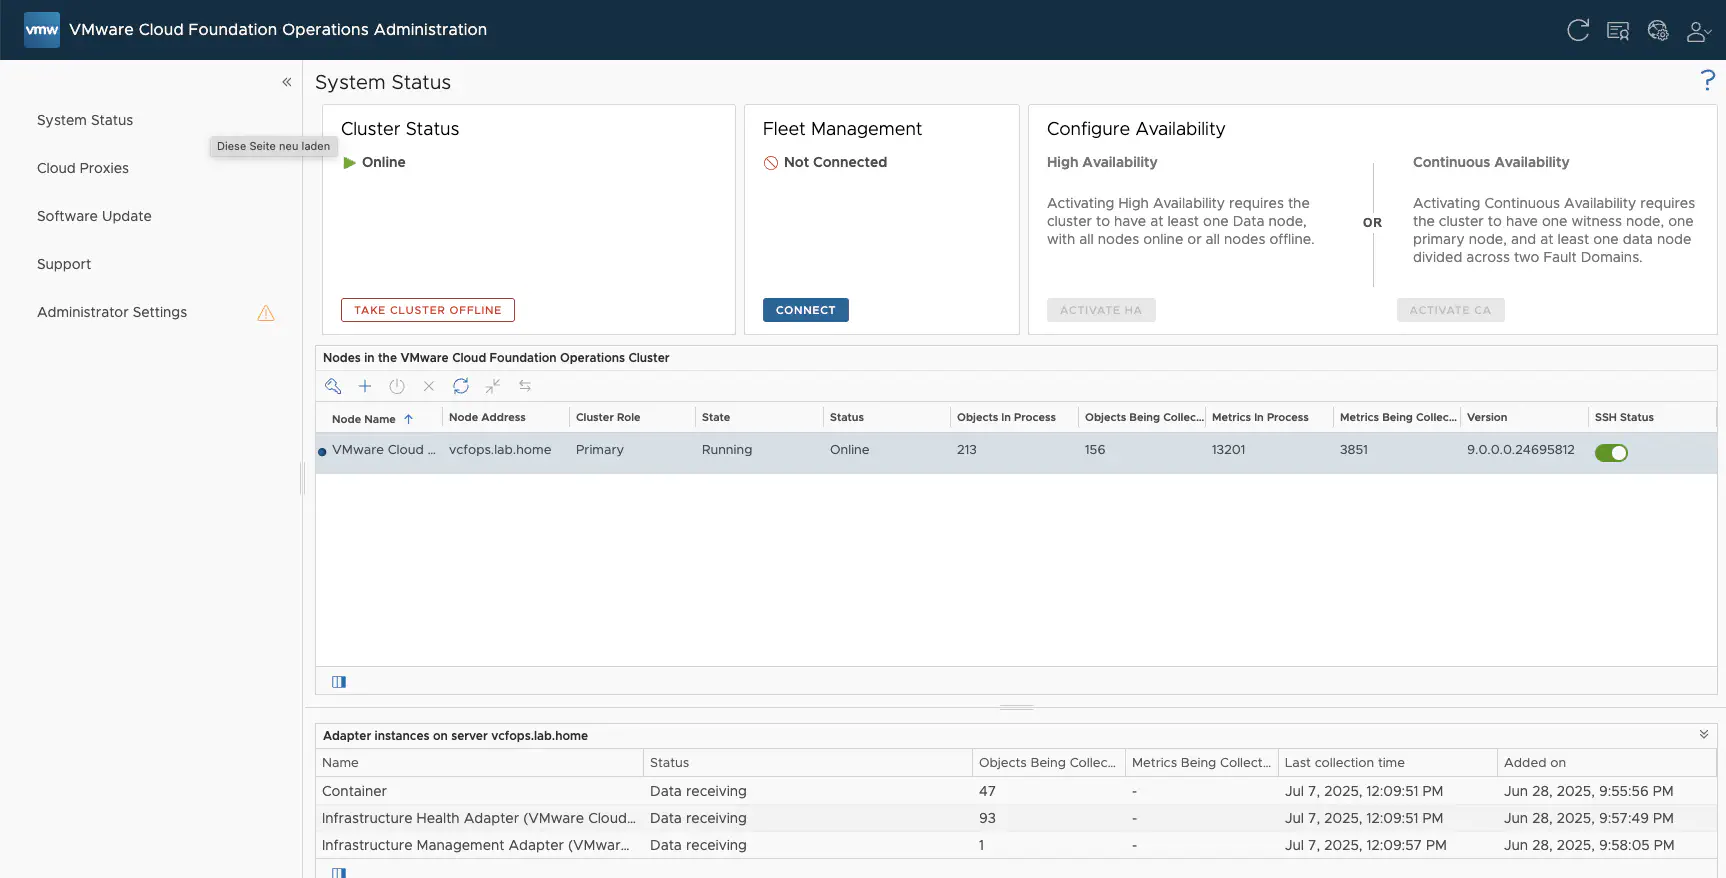
VCF Operations Admin Interface (click to enlarge)
This is where the “cluster” is put into operation. The process is straightforward. The operating system is also updated if necessary, provided that an Internet connection is available.
Since we deployed VCF Operations manually, no Fleet Manager is connected yet, of course.
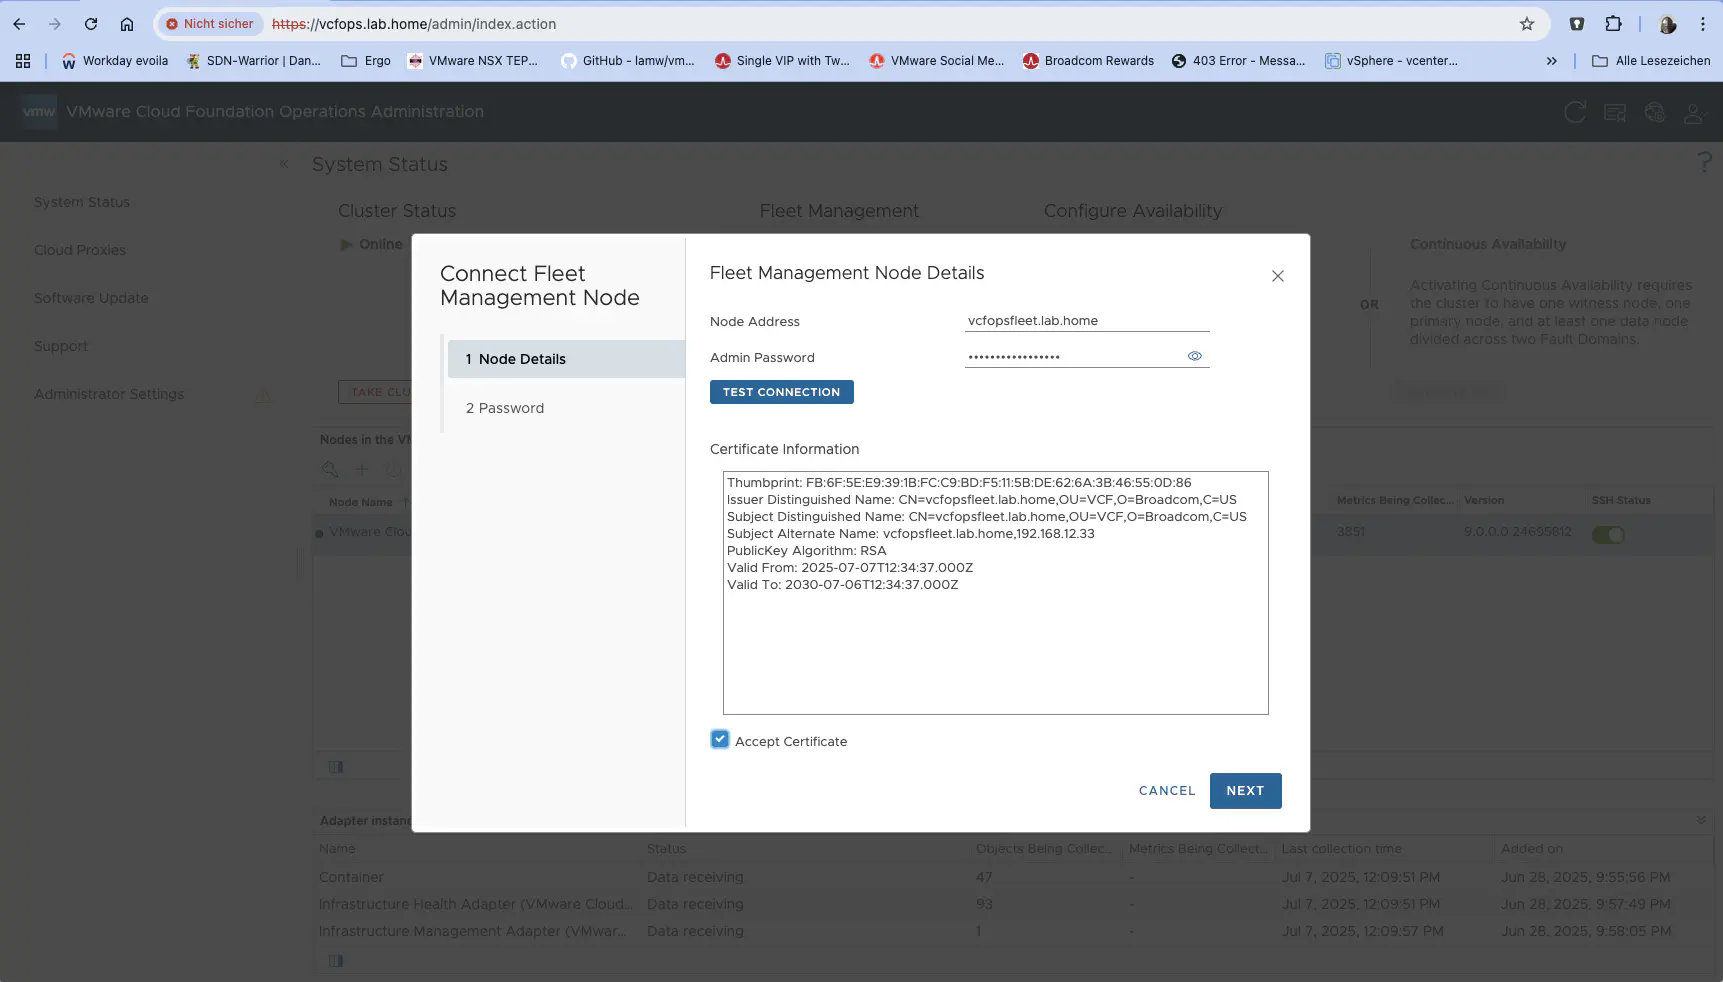
Fleet Management onboarding (click to enlarge)
Here you need the fleet manager FQDN and the admin password. In addition, the admin password for VCF Operations is required; without it, the process cannot be completed.
The admin password must comply with the new complexity rules. The days of VMware1! are over. If a password that is too weak was set during deployment, onboarding will now fail. Okay, I could have written that earlier, but you are warned about this during OVA deployment, and I’m sure my readers would never just click “continue” without thinking – not that this would have happened to the author here.
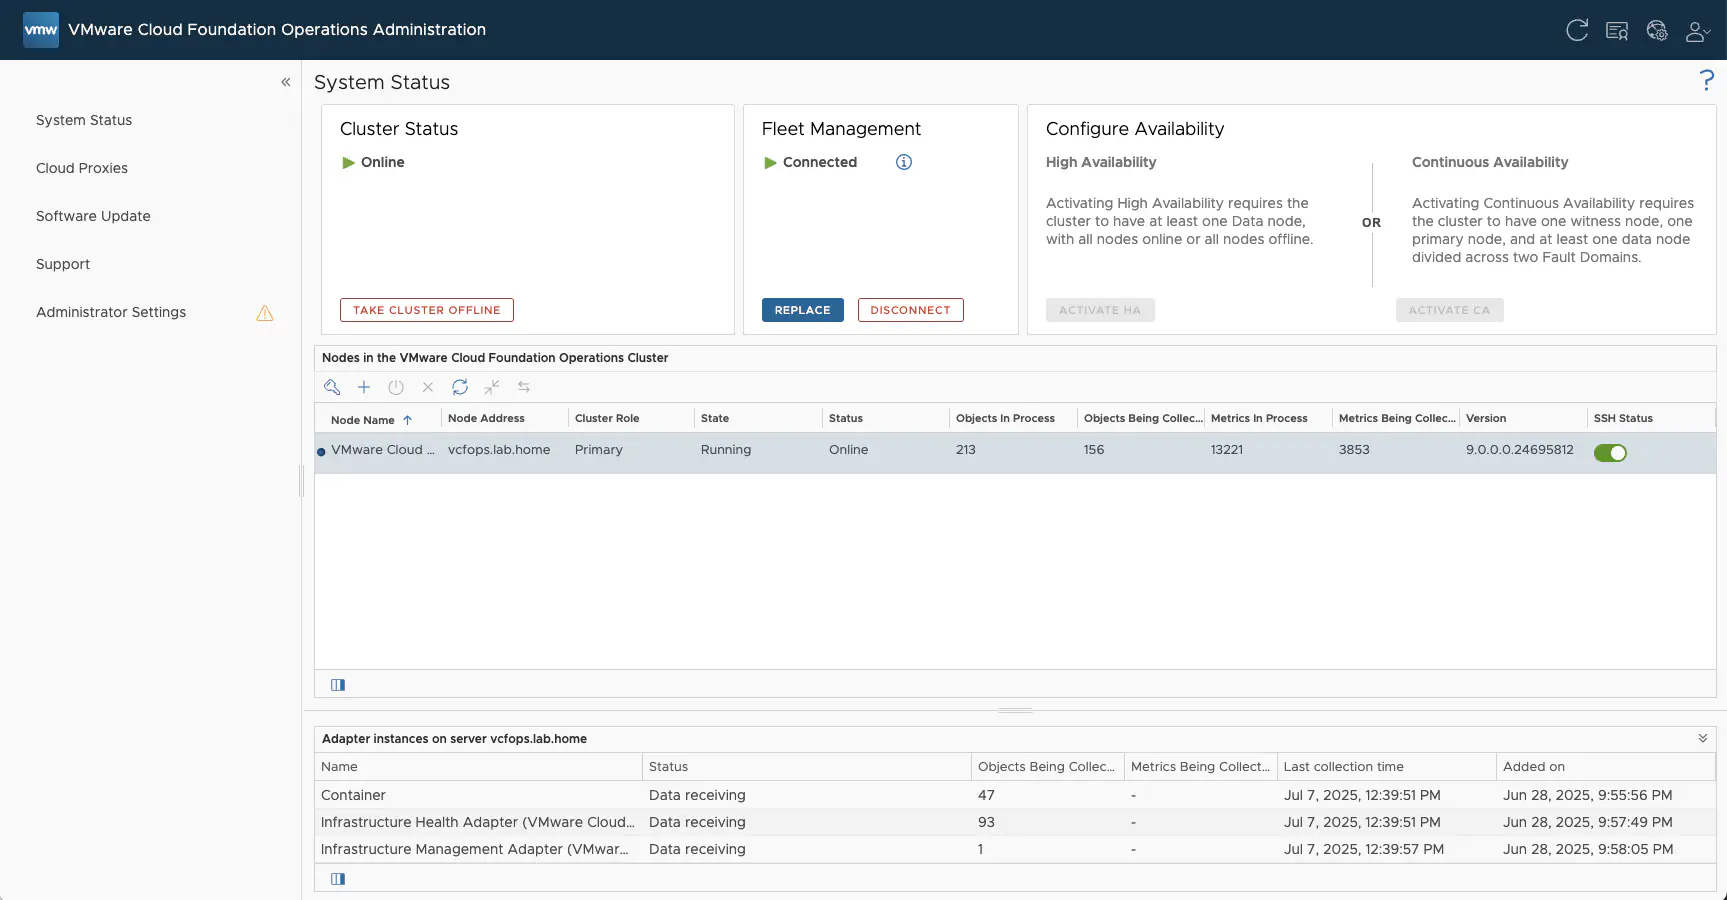
Fleet Management onboarding successfull (click to enlarge)
Of course, I was able to connect to the Fleet Manager right away the first time—at least that’s what I’m going to say. The whole process takes a little time, so it’s best to have a cup of coffee ready.
When the Fleet Manager is connected, a VCF operation instance with Pending Import is now displayed in Operations under Fleet Management -> Lifecycle.
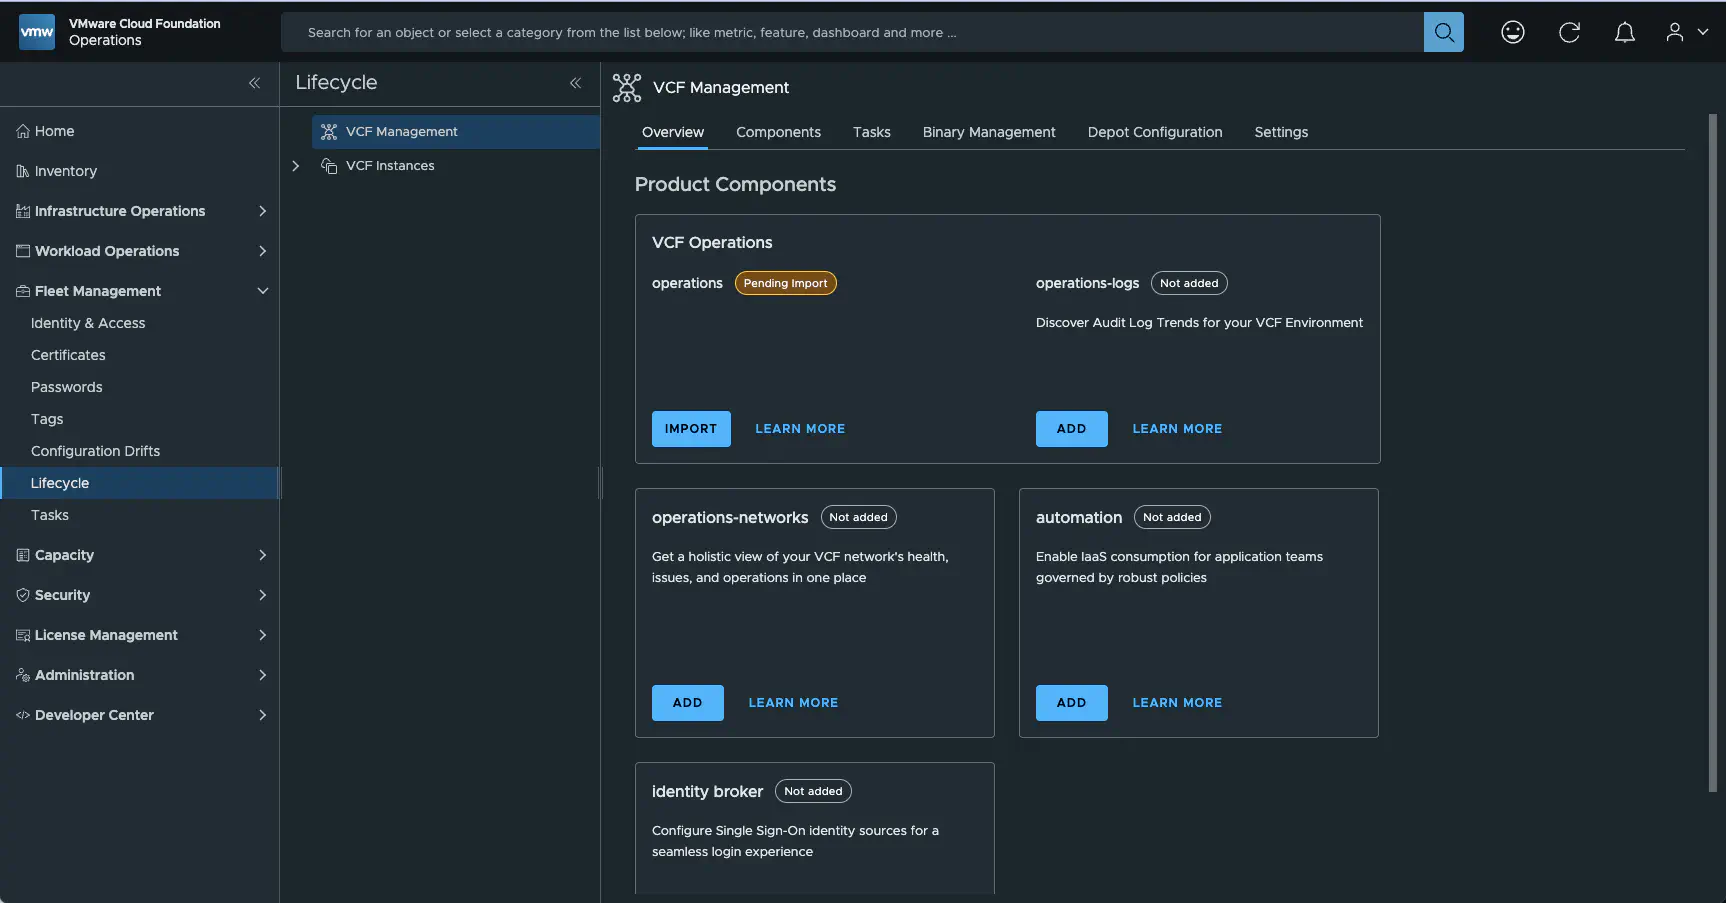
Pending VCF Operations (click to enlarge)
This should not cause us any concern and is completely normal. Before we can continue here, we need to onboard our future environments so that the Fleet Manager can do its job.
Onboarding of VCF and other ESX9 environments
At this point, it would also be possible to deploy a cloud proxy, but this is not necessary. To continue, my nested LAB and my ESX 9 servers must be integrated. This is done via Administration -> Integrations Here, you specify the accounts you want to onboard. For my ESX 9 servers, I select vCenter as the account type and specify the appropriate vCenter 9 and account details.
For my VCF configuration, I select vSphere Cloud Foundation for VCF. You need the login details for the SDDC Manager and not the vCenter. It is recommended to create separate credentials in Operations, even if you use the same password multiple times. I decided to enable “Domain Monitoring when creating” under Advanced Settings.
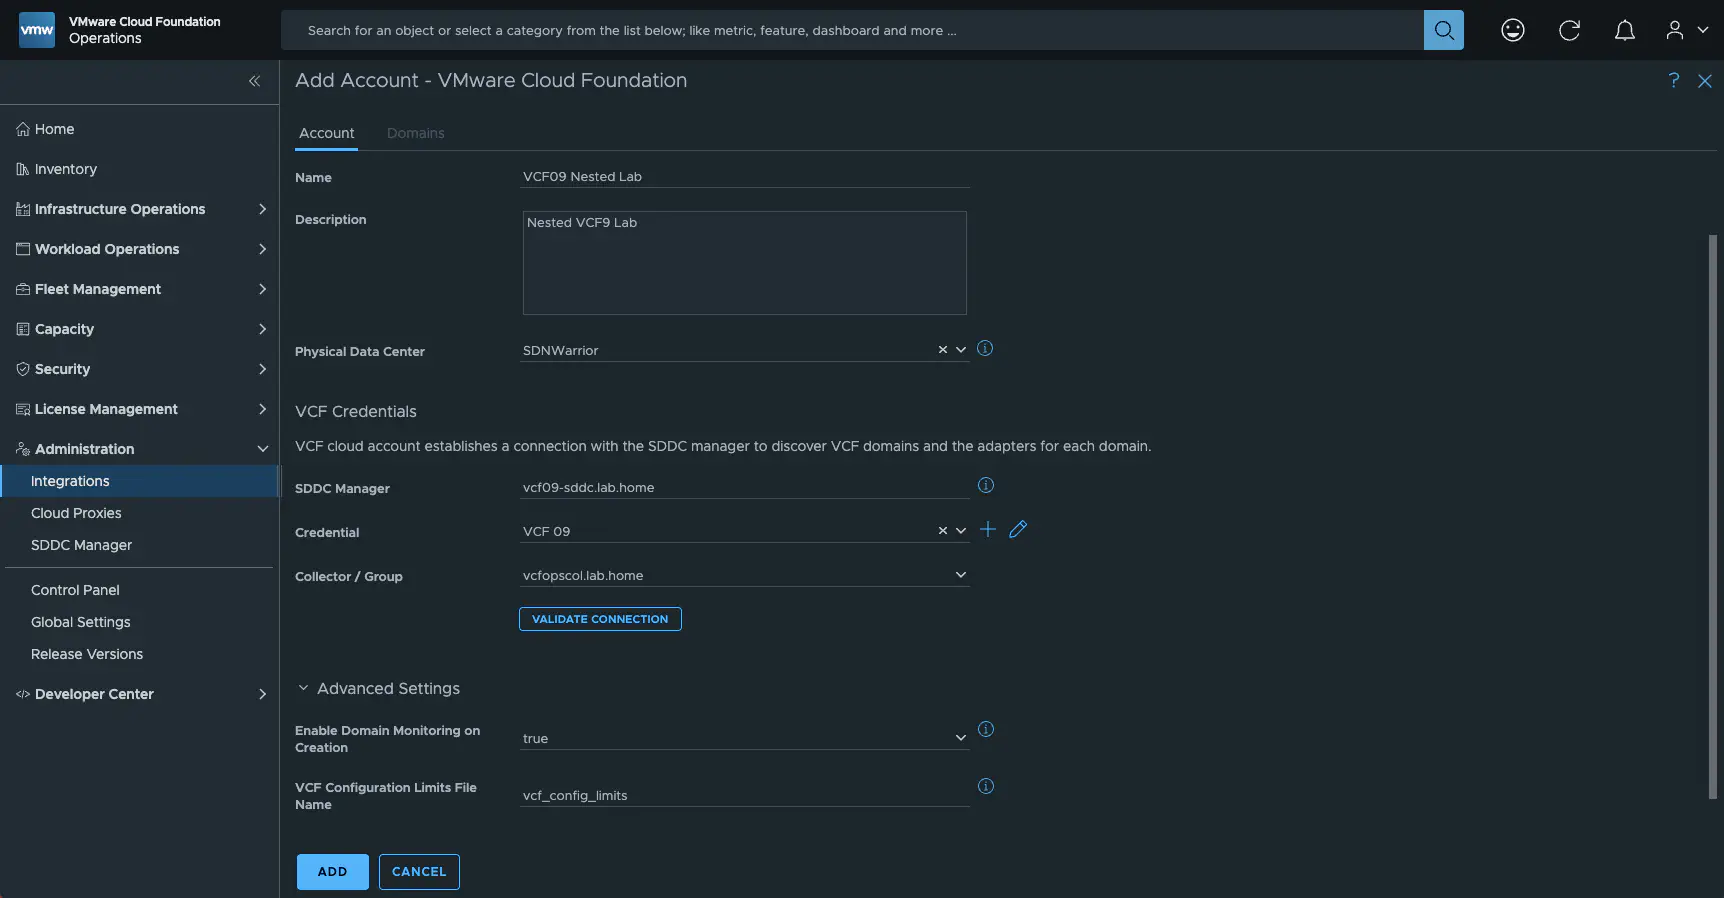
Account Integration (click to enlarge)
Under Collector / Group, you can select the collector you want to use for collecting data. The default collector group contains the VCF operations.
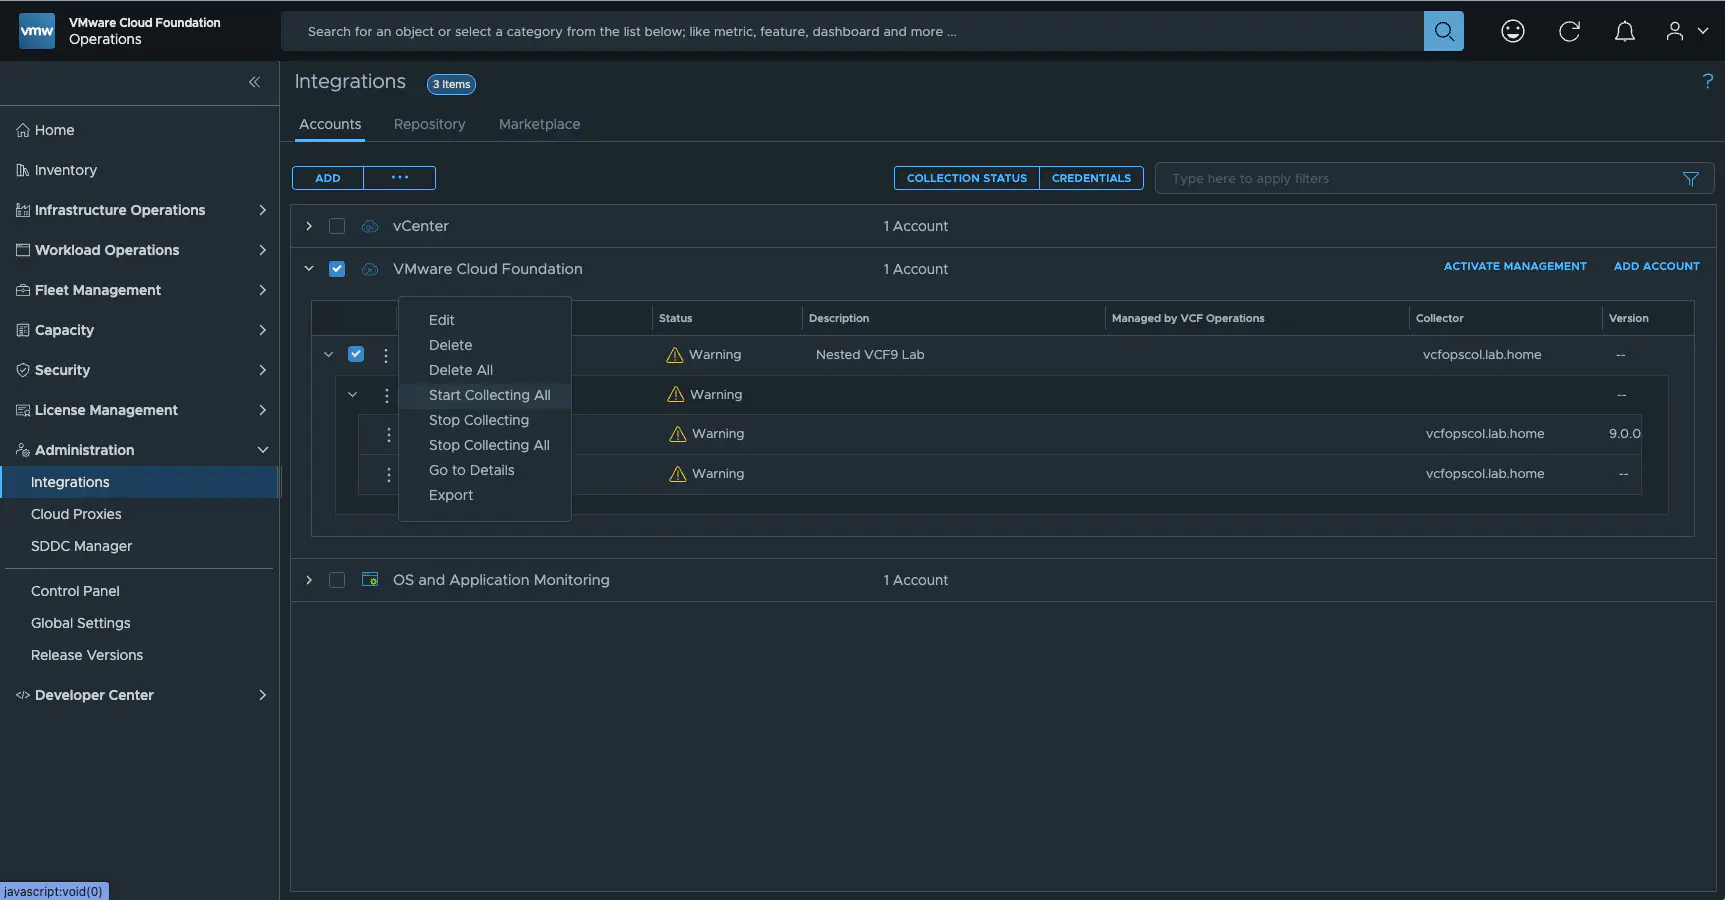
Collecting Status (click to enlarge)
After successfully adding our accounts, data collection must also be activated.
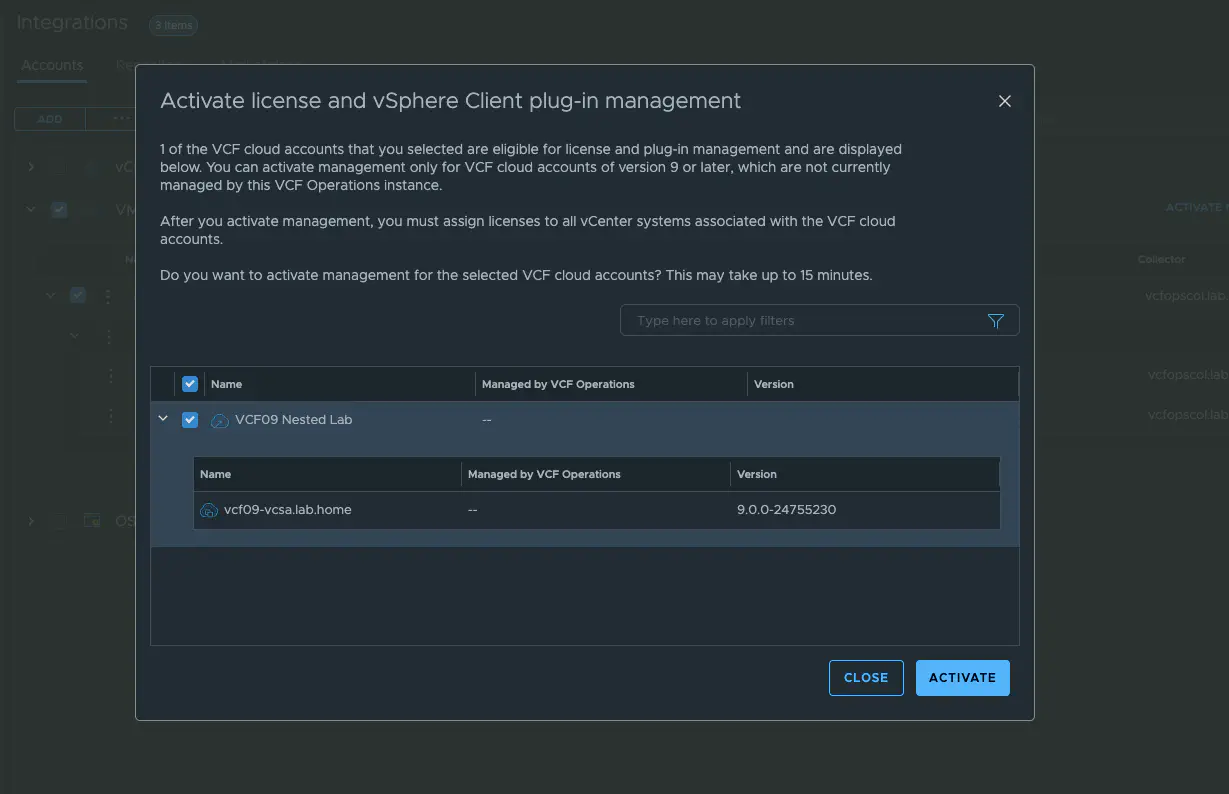
vSphere Client Plugin (click to enlarge)
Licensing
You must register the VCF Operations instance that you want to use for license management in the VCF Business Services console. There are two ways to do this: Connected and Disconnected.
- Connected Mode
If the environment is connected to the Internet, you can register your VCF Operations instance in connected mode. Connected mode provides a faster and simplified registration process and makes it easier to update your licenses. In addition, usage is automatically uploaded every night. The exact process for registering the VCF operation in connected mode can be found here. However, the entire process is guided very well by the GUI. The license must be updated every 6 months or when a subscription expires. In Connected mode, this can be done with a single click.
- Disconnected Mode
Disconnected mode is for all users who have a dark site and therefore no internet access for VCF operations. Onboarding is a little more complicated because license files and usage reports have to be uploaded and downloaded manually. Even in disconnected mode, you have to create and upload usage reports regularly. The license must be updated at least every 6 months or when a subscription expires. Instructions for disconnected mode can be found here. However, the process is really very simple and very well guided via the GUI.
Assigning licenses
After 15 minutes, the previously added vCenter will be displayed in VCF Operations. Under License Management – Licenses, i should now see my vCenter and VVF or VCF licenses that I previously assigned to my operations via the VCF Business Service Console. Because we have deployed a central VCF Operations, the licenses do not need to be split. Instead, I can assign the same license to all of my added vCenter9 instances, as long as there are enough cores available in my license. To do this, I select the vCenter instances and assign a primary license. This license is then imported into vCenter and used to license all other VCF products, such as NSX. vSAN must be assigned to the vCenters as a so-called add-on license.
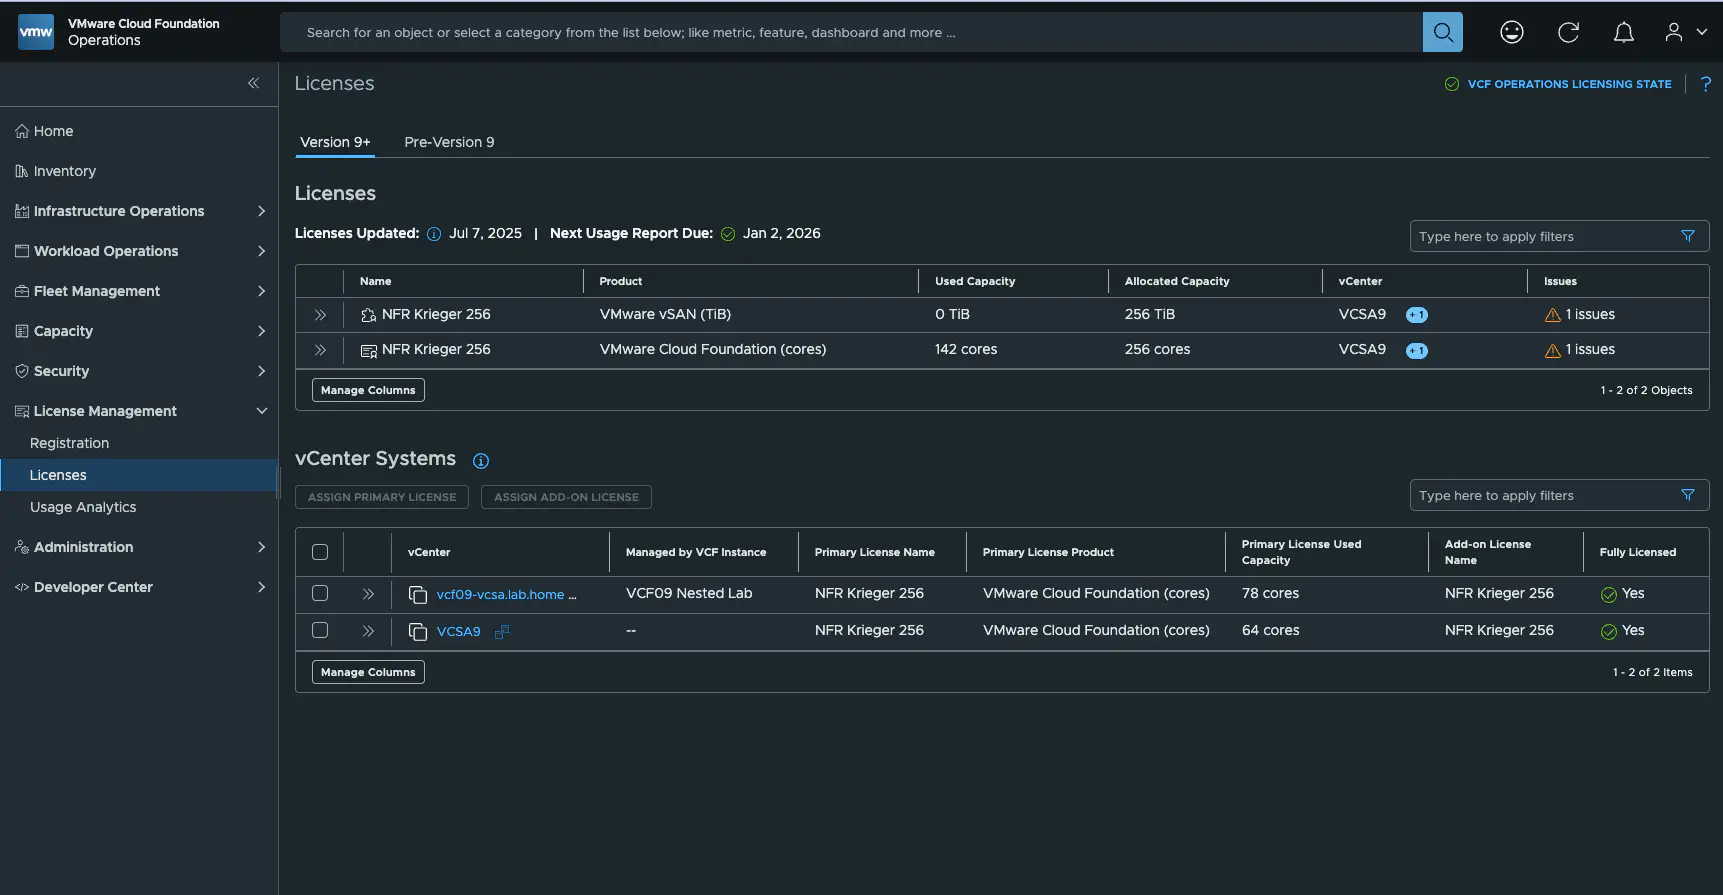
VCF License (click to enlarge)
Now all that’s missing is the VCF lifecycle. Remember, we still had one point left to cover.
VCF Lifecycle
We still had our fleet manager who hadn’t been fully onboarded yet. First, we need to create deployment targets. These can be found under Fleet Management -> Lifecycle -> VCF Management -> Deployment Targets.
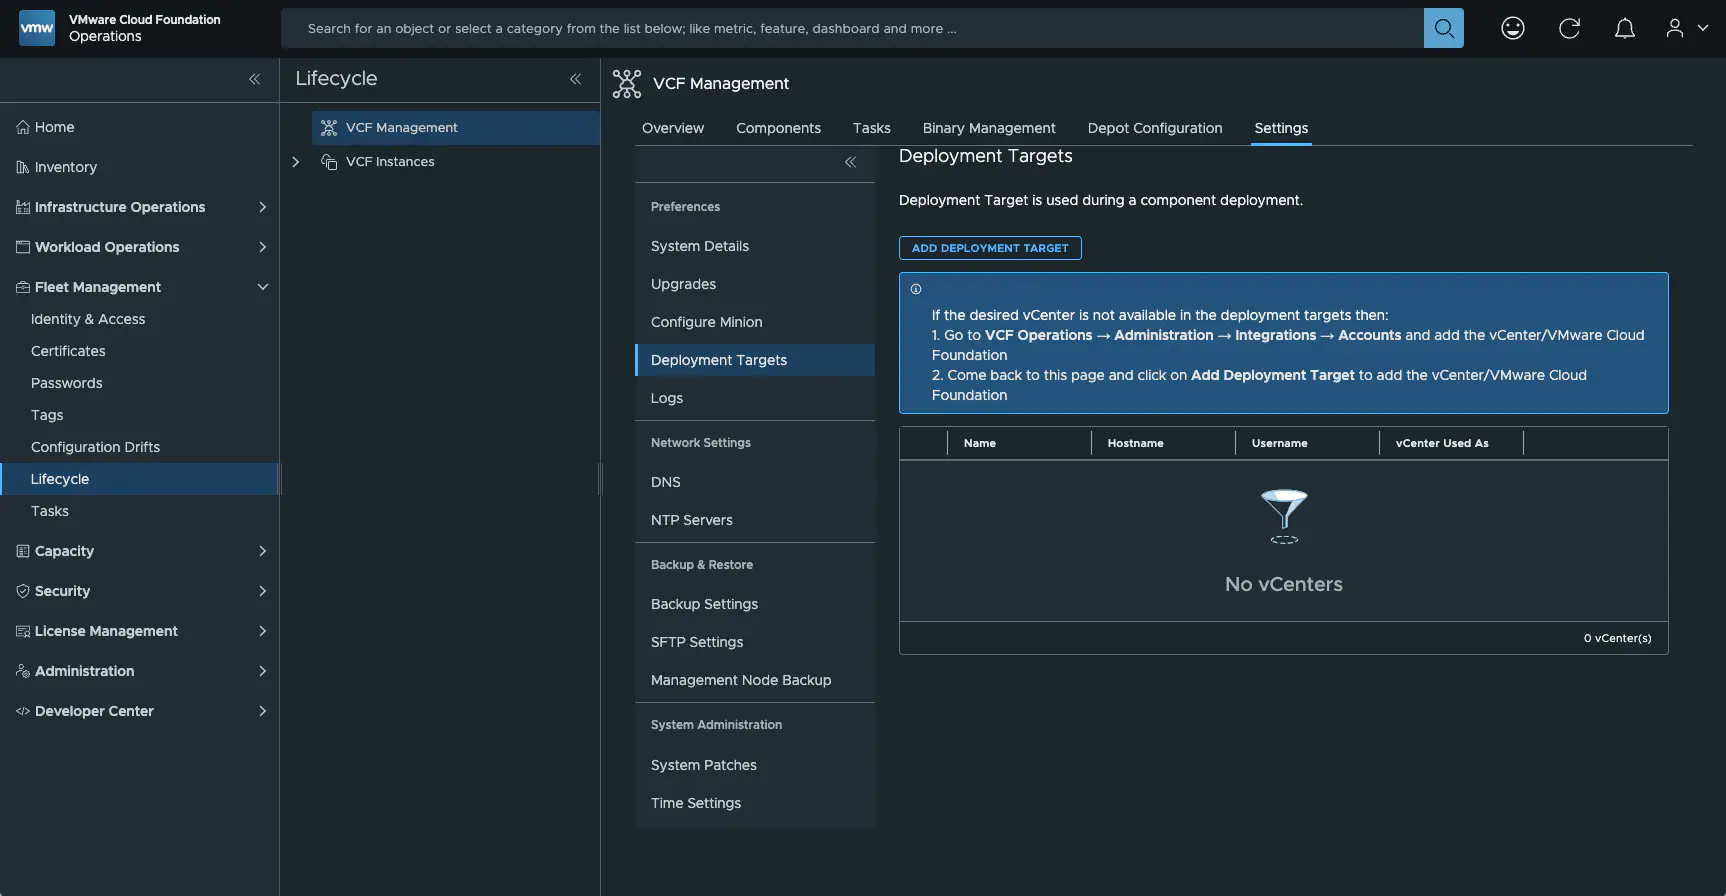
VCF License (click to enlarge)
The deployment target is important so that the Lifecycle Manager can deploy components. Here, too, the vCenter is selected and the correct account must be specified. If no suitable account exists, a new one can be created from the dialog box. The connection is then validated and the deployment target is configured.
Finally, we take care of our operation that is still displayed as Pending Import. To do this, we click on the Import button under Fleet Management -> Lifecycle -> VCF Management -> Overview for VCF Operations.
Import Operations (click to enlarge)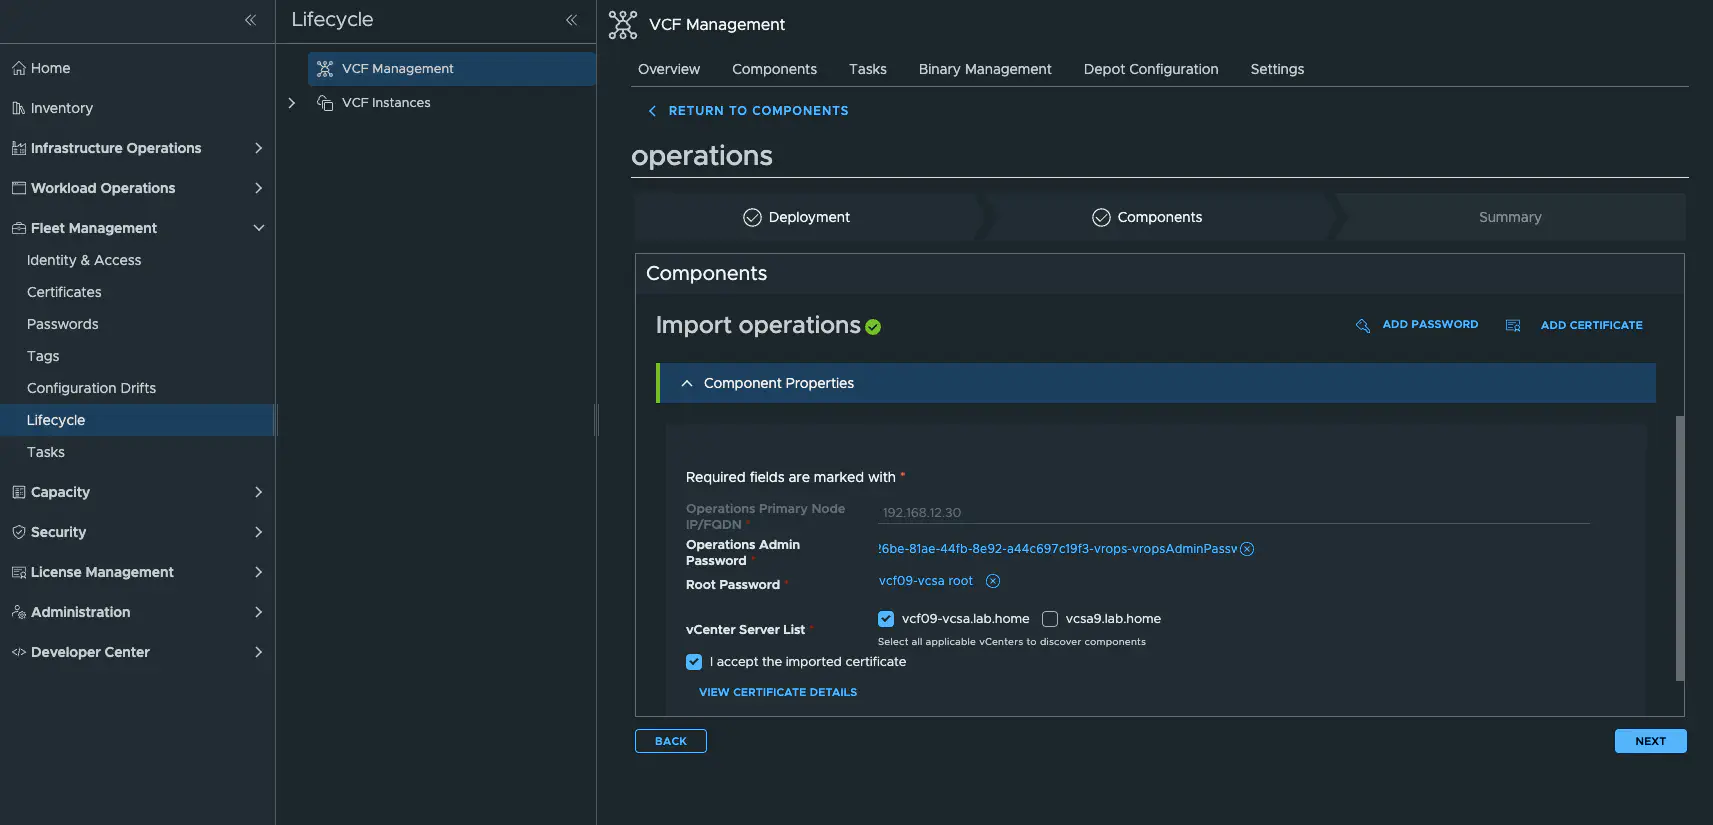
Most of it is already preselected; you just need to enter the root password for the vCenter instance where my components are located (VCF Operations and Cloud Proxies). After confirming with Next, you need to do the same for the Cloud Proxy.
Congratulations, our deployment should now look like this.
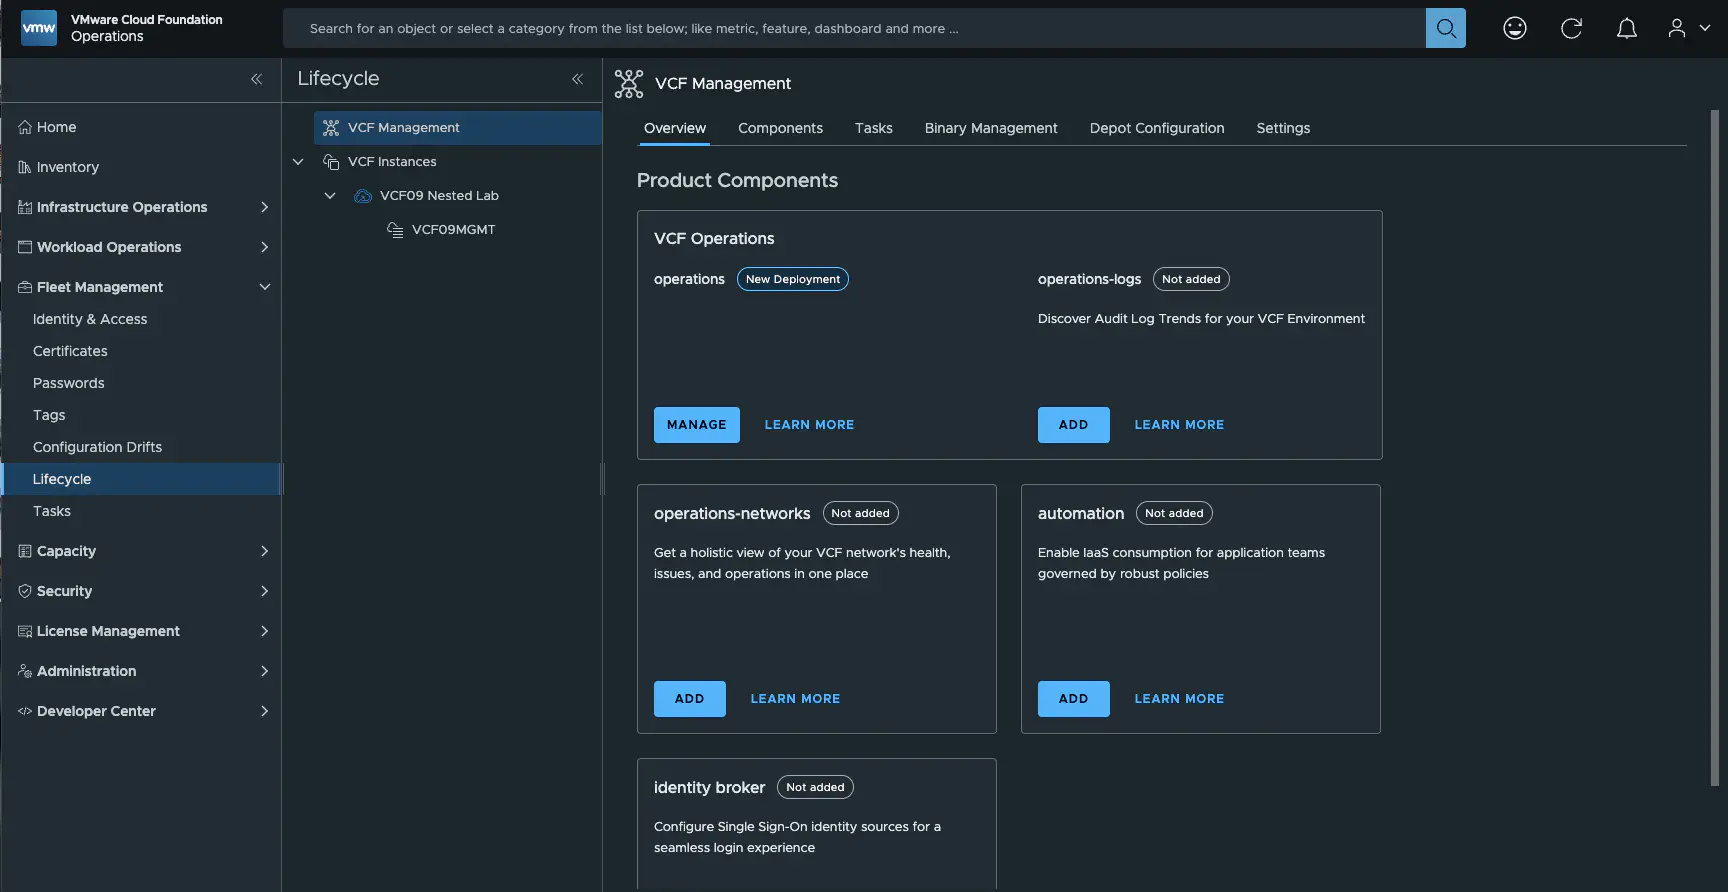
Import Operations (click to enlarge)
We are now able to deploy an operation for logs via the Fleet Manager. It is important that you have configured your Broadcom token under Depot Configuration or, if you have an offline repo, that this is configured.
But there are also a few limitations:
- VCF Management supports only one instance each of VCF Automation, VCF Operations, VCF Operations for logs, or VCF Operations for networks. All components integrate with VCF Operations.
- VCF Management supports multiple instances of VCF Identity Broker. For each VCF instance, VCF Management allows you to deploy one and only one VCF Identity Broker instance.
- You deploy VCF Identity Broker into either an embedded form factor such as vCenter or an external form factor such as a VCF appliance.
- The first VCF Automation or VCF Operations for networks instance that you import or deploy will be in integrated mode.
Resource requirements
| Function | vCPUs | RAM (Configured) | Provisioned Disk |
|---|---|---|---|
| VCF Operations | 4 | 16 GB | 158.18 GB |
| Cloud Proxy | 2 | 8 GB | 150.20 GB |
| Fleet | 4 | 12 GB | 205.43 GB |
I’m pretty sure that the required resources can still be adjusted in the lab. Especially when it comes to RAM, you should easily be able to get by with half, but I haven’t been able to test it properly yet.
Summary
Manual deployment is not as intuitive and simple as it is with the VCF installer. However, this setup allows me to easily control and manage my licenses via VCF Operations, which is particularly useful in an environment with nested Labs. For a production environment, I would prefer deployment in a VCF Management Domain. The components can still be shared by multiple instances if the security concept allows it. I think the blog has shown that import is also possible at a later date.
