VCF 9.1 - Setting up an Offline Repository
In this short blog post, I'd like to briefly describe how to build an offline repository for VCF 9.1 or earlier, from start to finish.
2398 Words // ReadTime 10 Minutes, 54 Seconds
2026-08-14 01:00 +0200
Introduction
We’ve all been there: you have multiple LAB installations in different states and versions, you live in Germany, and you only have what’s known as a “bamboo” internet connection - or, as a friend of mine once put it, “you with your McDonald’s hotspot internet.” Ouch!
Unfortunately, even in 2026, I still don’t have fiber-optic internet, and on some days it’s faster to download files via my backup 5G router than through my primary connection. Sounds like fun, right? Okay, and another reason is what’s known as a “dark site” - when the actual VCF installation or the installer can’t or isn’t allowed to connect to the internet.
Since I have to reinstall my vDefend Test VCF Lab installation every 90 days due to a lack of vDefend licenses, I just don’t feel like downloading 120+ GB onto a new machine every time. On top of that, I have various VCF installers - yes, I realize it sounds like a first-world problem, but it is what it is. Today, we’ll learn how to configure a basic Apache server, create certificates, use the VCF Download Tool, and—hopefully—end up with a ready-to-use Linux VM containing all the relevant data needed to update or redeploy a VCF installation. So, let’s get started.
Preparation
The only preparation needed is a reasonably up-to-date Ubuntu installation with internet access, SSH, and enough disk space. I’m using Ubuntu 26.04 Server and have set up a 35 GB boot partition and a 1 TB data partition. 2 vCPUs and 4 GB of RAM are sufficient. My VM runs on a Proxmox management server, but you can also run the VM on a NAS - the main thing is that the machine is accessible in the end. For the TLS certificate, you should have a suitable DNS entry; my repository VM listens to the wonderful FQDN repo.home.lab.
VCF Download Tool
The process for obtaining the binaries has changed slightly again with VCF 9.1, as a download token is no longer required - or rather, can no longer be used. Instead, the VCF Download Tool must now be registered in the VCF Business Service Console. This is done in a similar way to onboarding VCF Operations, but more on that later.
The VCF Download Tool can be downloaded from the Broadcom Support Portal. The easiest way to do this is to go to “My Downloads” and search for “Cloud Foundation.” Once you’ve navigated to the latest VCF version, you’ll find the tool under “Driver & Tools” -> VCF Download Tool.
After downloading the file—which is just over 500 MB—the tool must be copied to the future repository VM and extracted. I like to use my Mac’s built-in SCP support for this.
scp ~/Downloads/vcf-download-tool-9.1.0.0400.tar.gz daniel@repo.home.lab:/home/vcf/
Next, the tool must be extracted to the correct directory. In my case, /home is located on the 1 TB hard drive. The actual executable files we need will then be located in /home/vcf/vcf-download-tool/bin
tar -xzf vcf-download-tool-9.1.0.0400.*.tar.gz -C /home/vcf/vcf-download-tool --strip-components=1
cd /home/vcf/vcf-download-tool/bin
As mentioned earlier, to use the download tool, it must be registered in the VCF Business Service Console. To begin this process, you must first generate a software depot ID. You can do this using the following command.
./vcf-download-tool configuration generate --software-depot-id
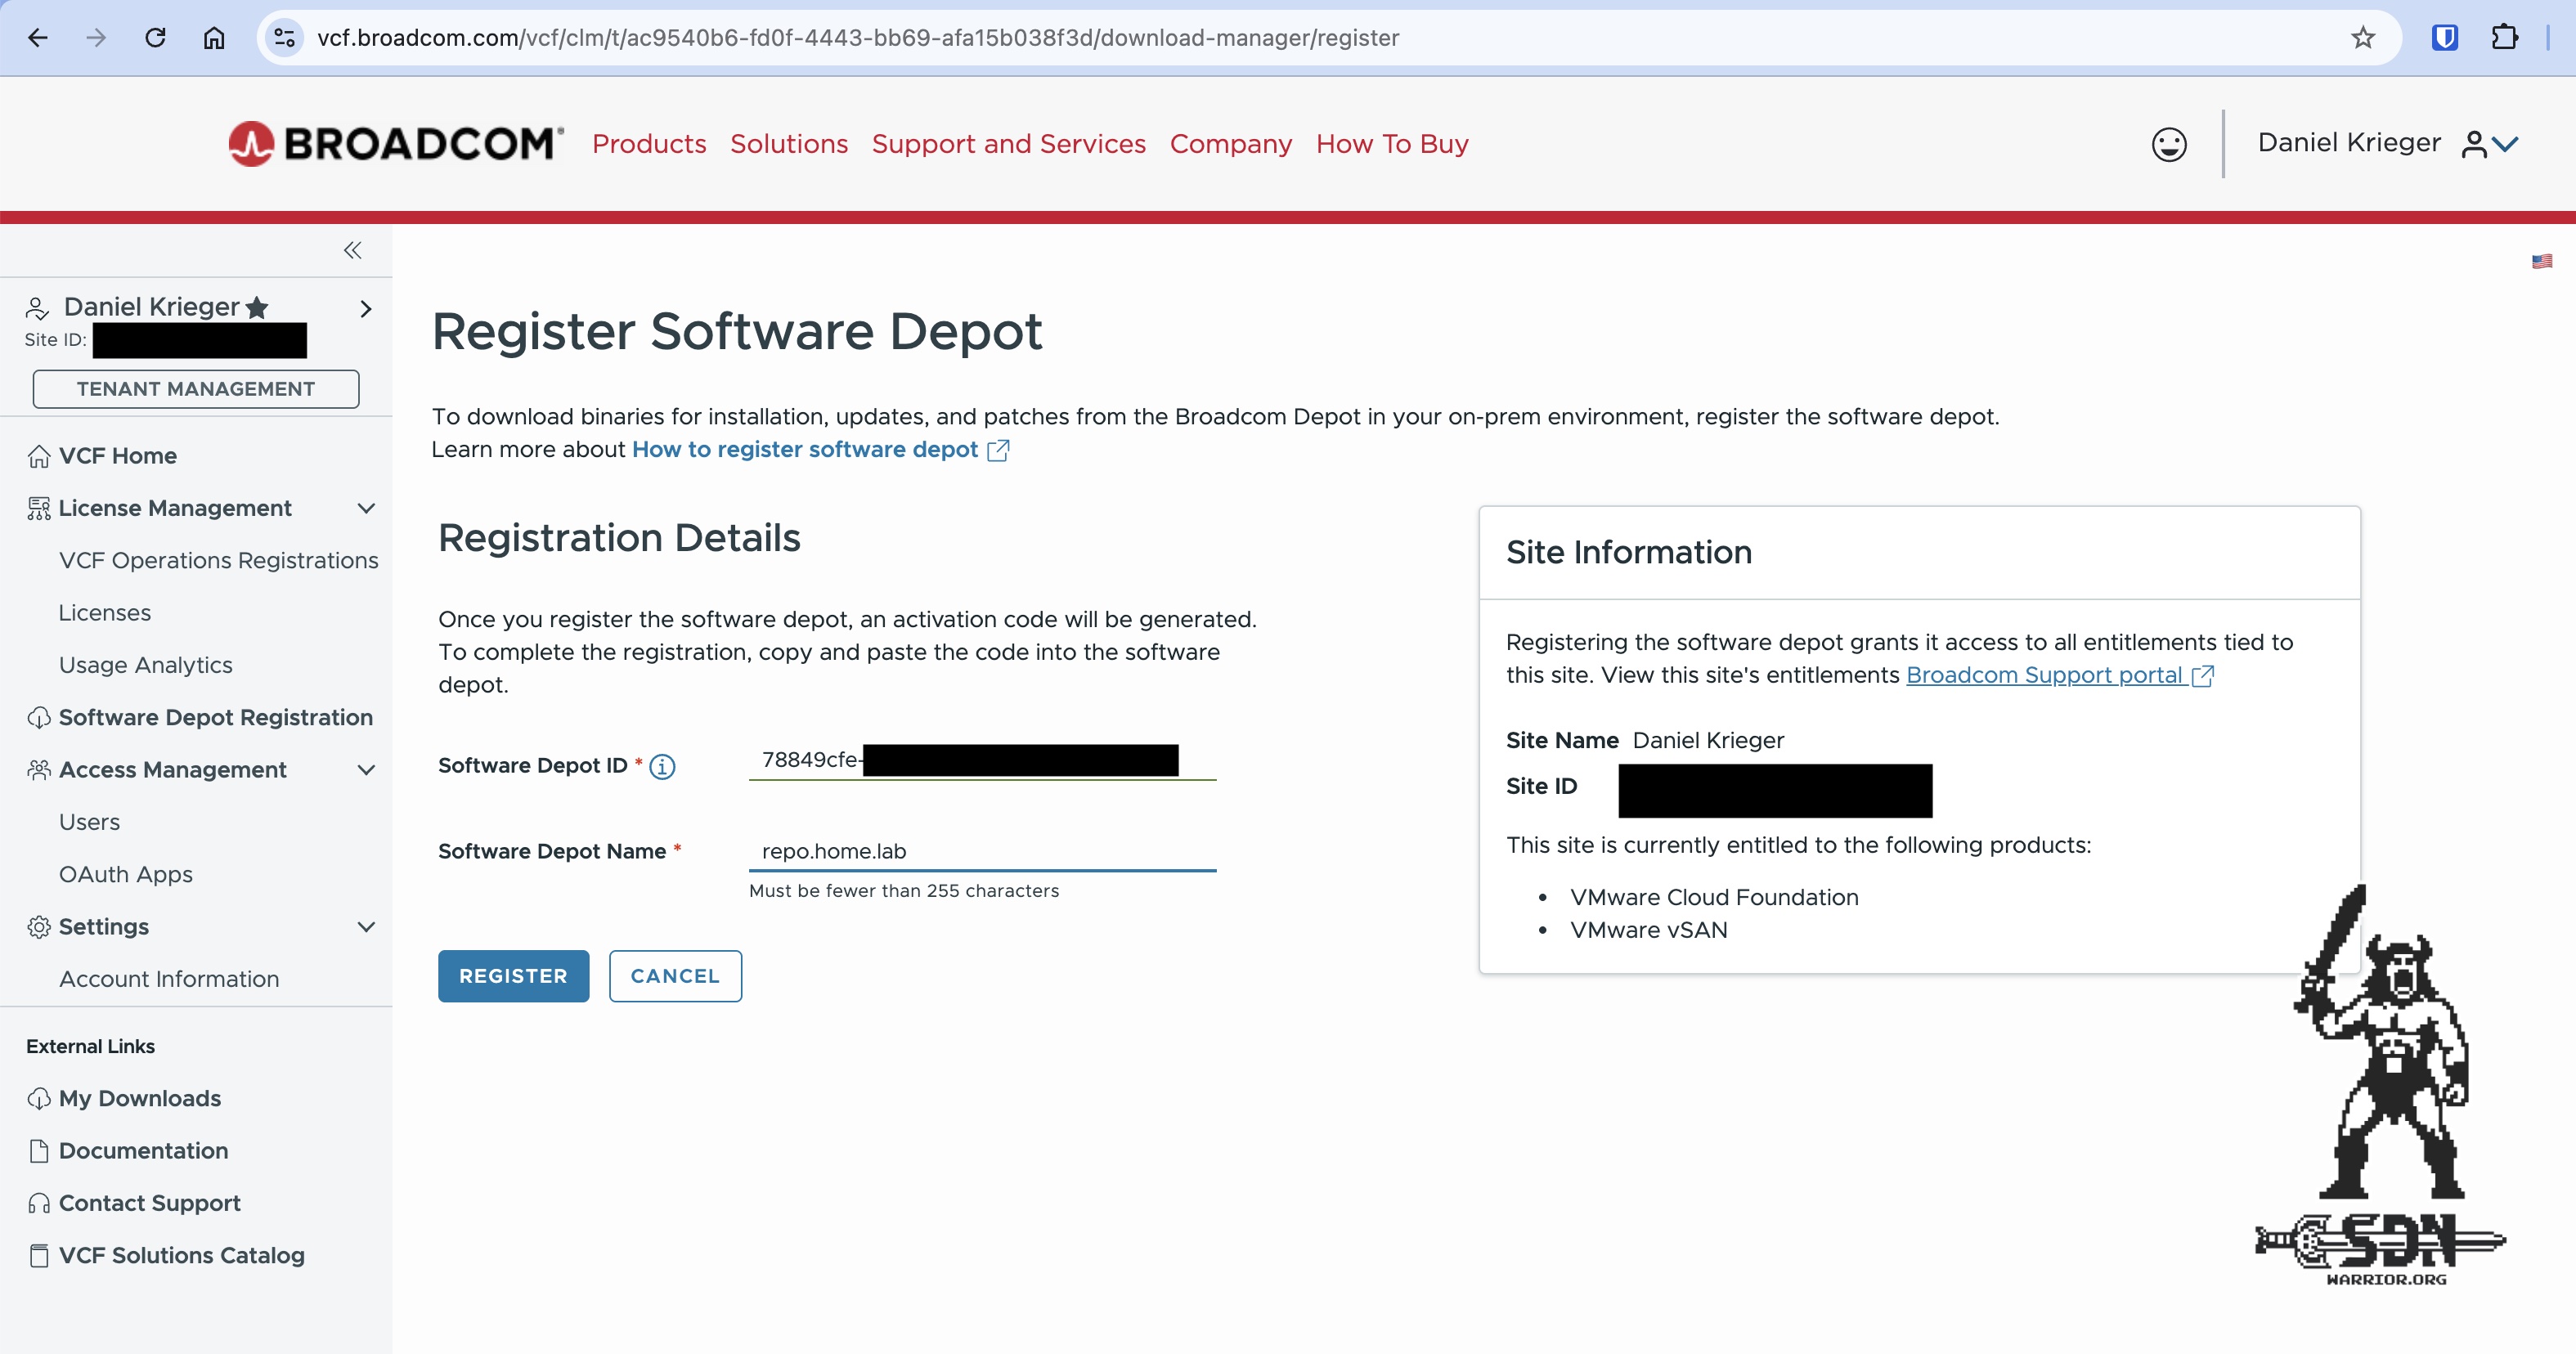
If everything went well, you should end up with a unique ID like this one: 78849cfe-****-47fd-99e6-*********** This ID must be copied and then entered under Software Depot Registration -> New Registration in the VCF Business Service Console. In response, you will receive an activation code. This code replaces the download token and must be saved to a file on the repository server.
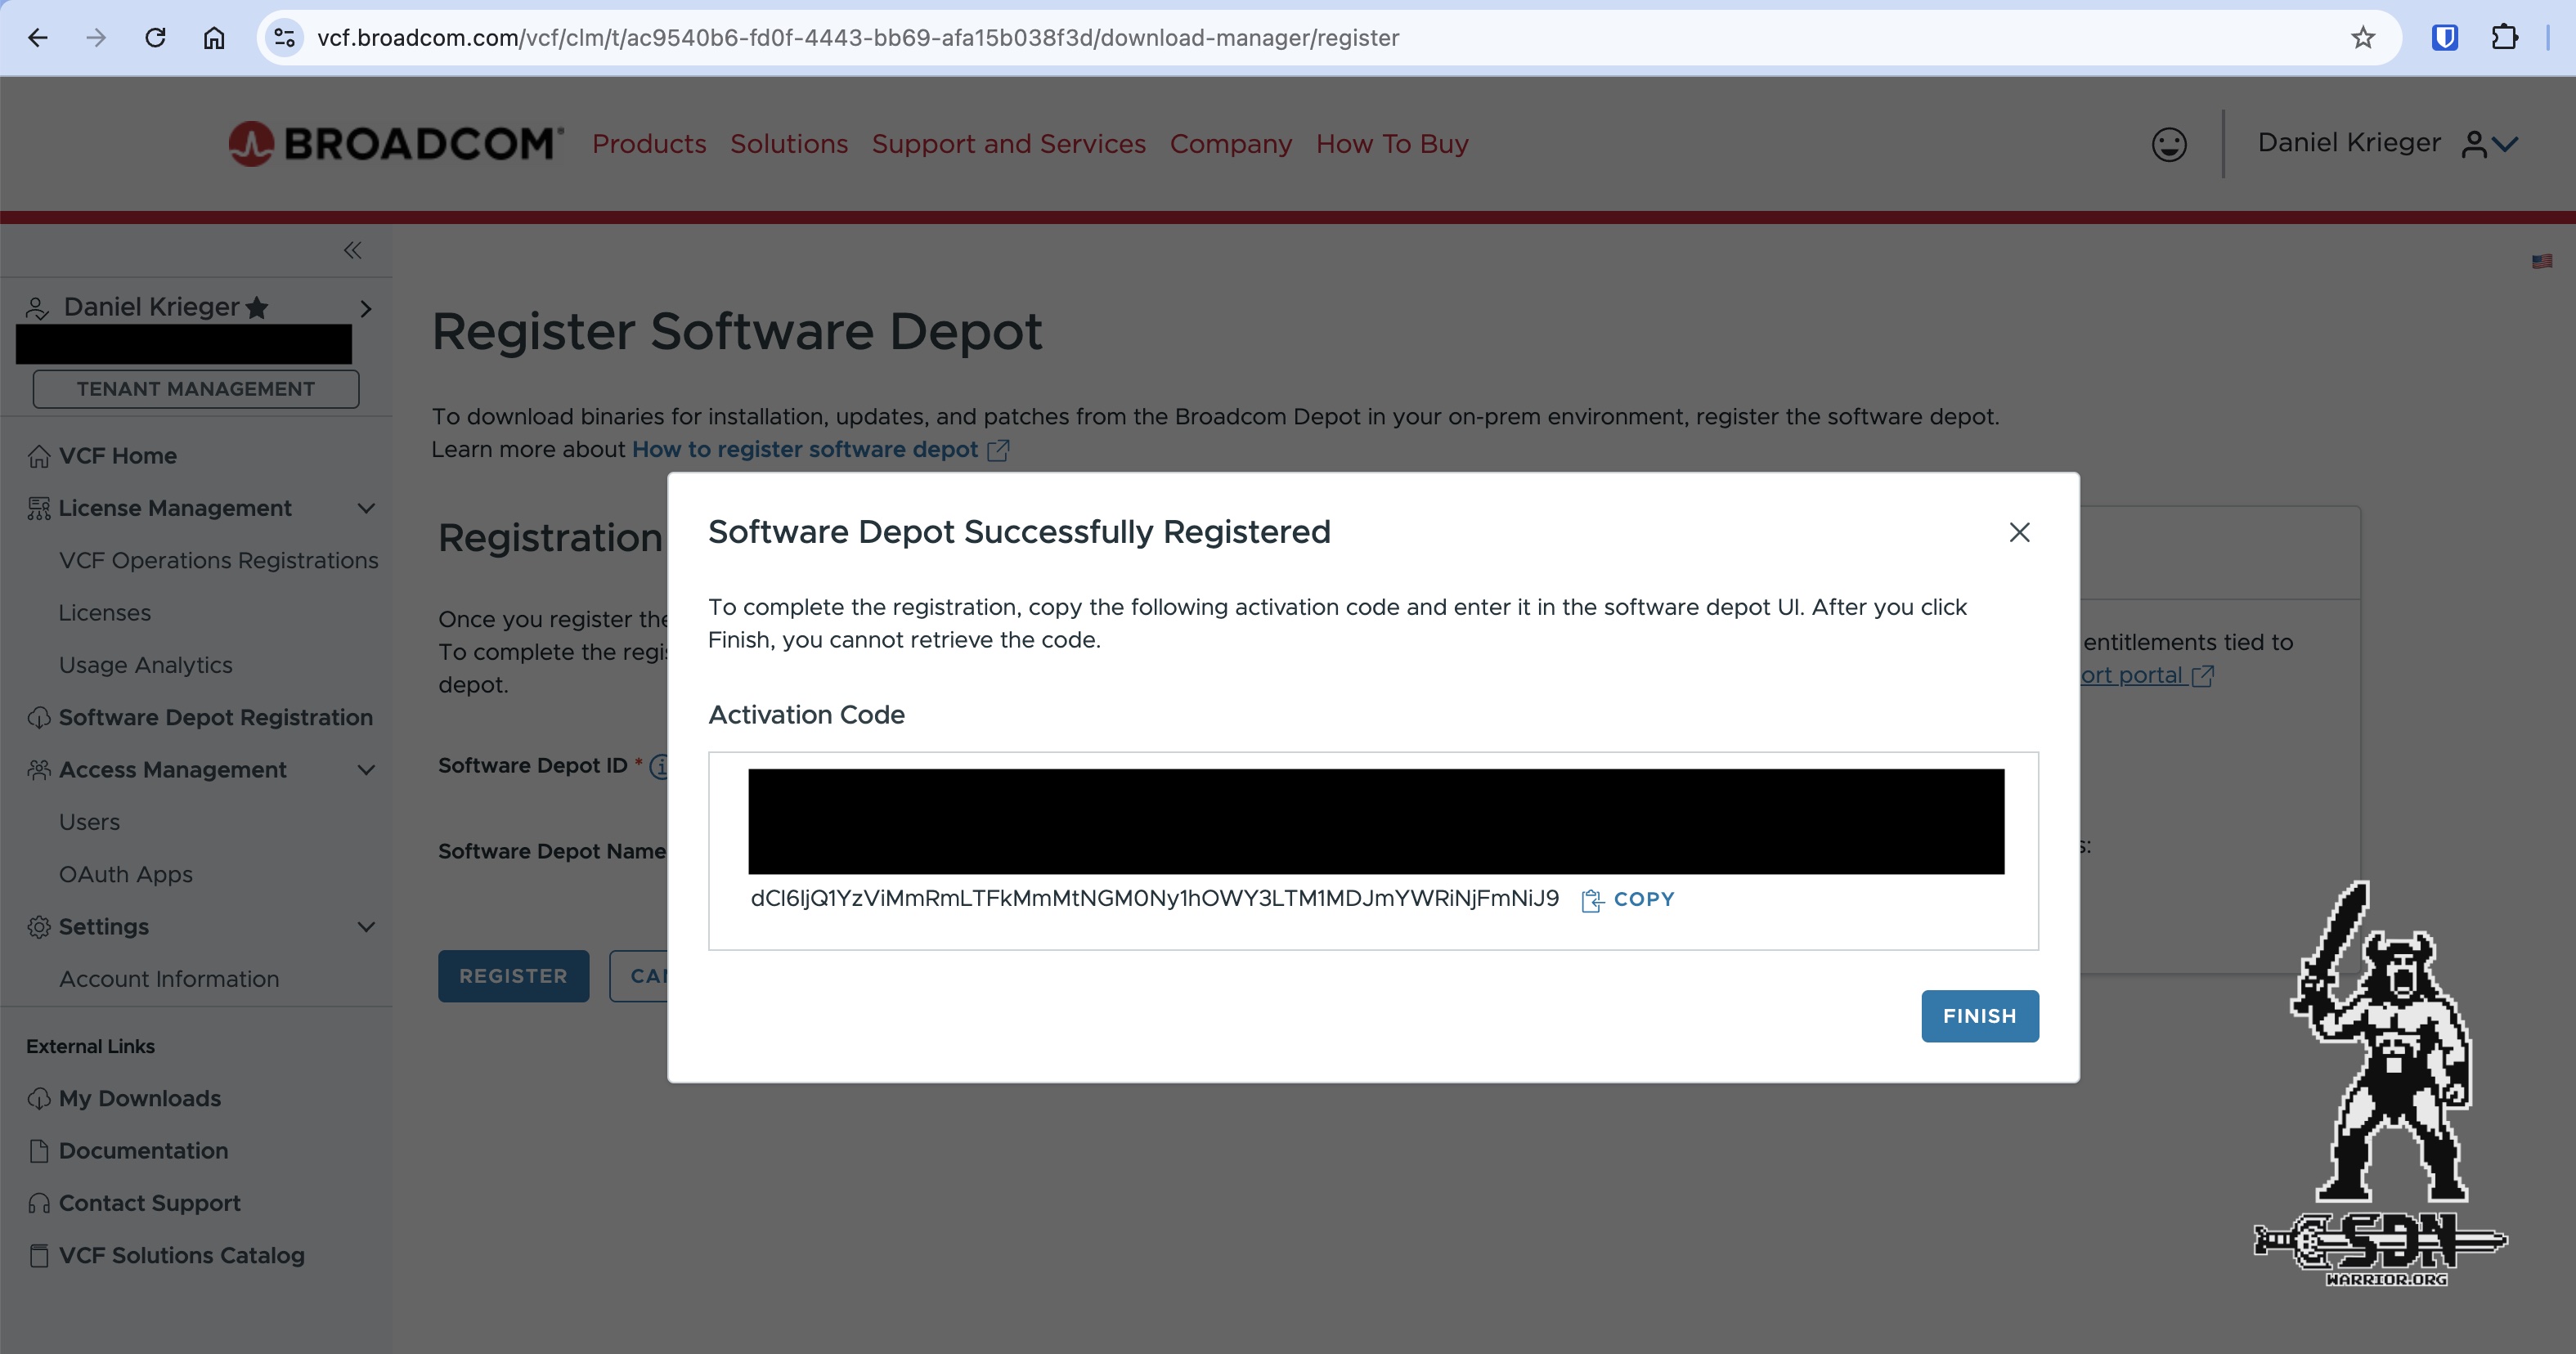
echo 'ACTIVATION-CODE' > /home/vcf/vcf-activation-code.txt
If you want, you can set this file to read-only, or—if there are multiple users set up on the system—configure the permissions so that only authorized users can read the file. Since this is a lab installation for me, I’ll skip that step. Next, I’ll create the “depot” folder where all the files will be saved, and then the fun of downloading can really begin. Ideally, your folder structure should look like this:
/home/vcf/
├── depot/
├── vcf-activation-code.txt
├── vcf-download-tool/
└── vcf-download-tool-9.1.0.0400.25570101.tar.gz
Download the installation binaries
To save storage space, you can limit the versions when using the download tool. In my case, I only need the 9.1.0 files with day 2 optional Components. But I could also filter for a specific express patch version or only download the installation binaries. run the following command for the full installation package:
./vcf-download-tool binaries download --vcf-version 9.1.0 --sku VCF --type=INSTALL --depot-download-activation-code-file /home/vcf/vcf-activation-code.txt --depot-store /home/vcf/depot/
Key Parameters:
-
binaries downloadDownloads VCF product binaries into the local software depot. -
--vcf-version 9.1.0Specifies VMware Cloud Foundation version 9.1.0. -
--sku VCFSelects the VMware Cloud Foundation product SKU. -
--type INSTALLDownloads binaries required for installation and Day-0 deployment. -
--depot-download-activation-code-fileSpecifies the file containing the Software Depot Activation Code used for authentication. -
--depot-storeSpecifies the root directory of the local offline depot where the binaries are stored.
For companies that use proxies, the proxy parameters might still be of interest.
--proxy-server,--proxy-https,--proxy-user,--proxy-user-password-file
I think they’re pretty self-explanatory and don’t need to be explained in more detail.
If the repo is only to be used for deployment, no further downloads are needed at this point. If upgrades are to be enabled, additional files will need to be downloaded.
Download the upgrade binaries
To use our repository for upgrades as well, we still needed the upgrade binaries. These are loaded in exactly the same way as the installation binaries, except that the type is set to UPGRADE.
./vcf-download-tool binaries download --vcf-version 9.1.0 --sku VCF --type=UPGRADE --depot-download-activation-code-file /home/vcf/vcf-activation-code.txt --depot-store /home/vcf/depot/
Download the ESX binaries and metadata
In addition to the VCF components, you’ll also need the ESX upgrade files. You can do this using the download tool as well, but the command is slightly different. By default, the Download Tool downloads patches up to ESXi 6.7 here. We should change that to a more appropriate level.
You can use this command to check the current configuration. All possible versions should still be configured here.
./vcf-download-tool esx configuration -G
embeddedEsx-6.7-INTL
embeddedEsx-7.0-INTL
embeddedEsx-8.0-INTL
embeddedEsx-9.0-INTL
embeddedEsx-9.1-INTL
esxio-8.0-INTL
esxio-9.0-INTL
esxio-9.1-INTL
armEsx-9.1-INTL
As for me, I only need the VCF 9.1 ESX patches for Intel. That’s why I’m disabling everything except embeddedEsx-9.1-INTL.
./vcf-download-tool esx configuration \
-D embeddedEsx-6.7-INTL \
-D embeddedEsx-7.0-INTL \
-D embeddedEsx-8.0-INTL \
-D embeddedEsx-9.0-INTL \
-D esxio-8.0-INTL \
-D esxio-9.0-INTL \
-D esxio-9.1-INTL \
-D armEsx-9.1-INTL
Before running the download command, you should double-check to make sure all unnecessary patches have been removed. After that, I use the following command to download the approximately 4 GB of patches.
./vcf-download-tool esx download \
--depot-download-activation-code-file /root/vcf-activation-code.txt \
--depot-store /home/vcf/depot/
If everything went through successfully, the repository directory should look something like this:
/home/vcf/depot/
├── PROD
│   ├── COMP
│   │   ├── DEPOT_SERVICE
│   │   ├── ESX_HOST
│   │   ├── HCX
│   │   ├── NSX_ALB
│   │   ├── NSX_T_MANAGER
│   │   ├── SDDC_MANAGER_VCF
│   │   ├── TELEMETRY_ACCEPTOR
│   │   ├── VCENTER
│   │   ├── VCFDT
│   │   ├── VCF_FLEET_LCM
│   │   ├── VCF_LICENSE_SERVER
│   │   ├── VCFMS_METRICS_STORE
│   │   ├── VCF_OBSERVABILITY_DATA_PLATFORM
│   │   ├── VCF_OPS_CLOUD_PROXY
│   │   ├── VCF_SALT
│   │   ├── VCF_SALT_RAAS
│   │   ├── VCF_SDDC_LCM
│   │   ├── VCF_SERVICE_VCD_MIGRATION_BACKEND
│   │   ├── VIDB
│   │   ├── VRA
│   │   ├── VRLI
│   │   ├── VRNI
│   │   ├── VROPS
│   │   ├── VSAN_FILE_SERVICES
│   │   └── VSP
│   ├── metadata
│   │   ├── Compatibility
│   │   ├── manifest
│   │   ├── productVersionCatalog
│   │   └── vsan
│   └── vsan
│       └── hcl
└── umds-patch-store -> /home/vcf/depot/PROD/COMP/ESX_HOST/patch-store
Installing and Configuring the apache Server
Now that we’ve gotten the fun download part out of the way, let’s move on to actually setting up the repo. To do this, I’ll install a apache server and set up a minimal configuration for it. In production environments, of course, apache should be hardened.
sudo apt update
sudo apt install apache2 openssl apache2-utils unzip
Next, I’ll create an OpenSSL config file. I’m using my Windows CA to generate the certificate. However, you can also create a self-signed certificate. Regardless of how you create your certificate, it must be imported into the VCF installer later.
[ req ]
default_bits = 4096
prompt = no
default_md = sha256
distinguished_name = dn
x509_extensions = v3_req

[ dn ]
C = DE
ST = RLP
L = NW
O = SDN-Warrior
OU = SDN-Warrior
CN = repo.home.lab

[ v3_req ]
basicConstraints = CA:FALSE
keyUsage = digitalSignature, keyEncipherment
extendedKeyUsage = serverAuth
subjectAltName = @alt_names

[ alt_names ]
DNS.1 = repo.home.lab
IP.1 = 192.168.5.6
I create a new folder in the Apache directory where I store my TLS files—namely, the private key, the CSR request, and, finally, the generated certificate.
sudo mkdir /etc/apache2/ssl/
To generate my certificate request and private key, I run the following command:
sudo openssl req -nodes \
  -newkey rsa:4096 \
  -keyout /etc/apache2/ssl/vcf.key \
  -out /etc/apache2/ssl/vcf.csr \
  -config /home/vcf/openssl.cnf
If you want to use a self-signed certificate instead, you can do so with this command:
 sudo openssl req -x509 -nodes \
  -days 365 \
  -newkey rsa:4096 \
  -keyout /etc/apache2/ssl/vcf.key \
  -out /etc/apache2/ssl/vcf.crt \
  -config /home/vcf/openssl.cnf
Next, you’ll need a user for Apache’s basic authentication. I’m going to create a user named vcf here. After running the command, you’ll need to set a password for the user. The same applies here: in a production environment, you should set a strong password. Additionally, basic authentication is unencrypted, so you must use HTTPS.
sudo htpasswd -c /etc/apache2/.htpasswd vcf
Next, Apache needs to be configured. To do this, I cleared the original file and replaced it with my configuration.
sudo nano /etc/apache2/sites-available/default-ssl.conf
Apache configuration:
<VirtualHost *:443>
    ServerAdmin sdnwarrior@localhost
    DocumentRoot /home/vcf/depot

    SSLEngine on
    SSLCertificateFile /etc/apache2/ssl/vcf.crt
    SSLCertificateKeyFile /etc/apache2/ssl/vcf.key
    SSLProtocol all -SSLv3 -TLSv1 -TLSv1.1
    RequestHeader unset Proxy early

    <Directory /home/vcf/depot>
        Options Indexes FollowSymLinks
        AllowOverride None
        AuthType Basic
        AuthName "VCF Depot"
        AuthUserFile /etc/apache2/.htpasswd
        Require valid-user
    </Directory>
</VirtualHost>
The most important thing here is the DocumentRoot, and that the paths to the certificate and the private key are correct. After that, just start the services, and the repository should be accessible.
sudo a2enmod ssl headers
sudo a2ensite default-ssl
sudo systemctl restart apache2
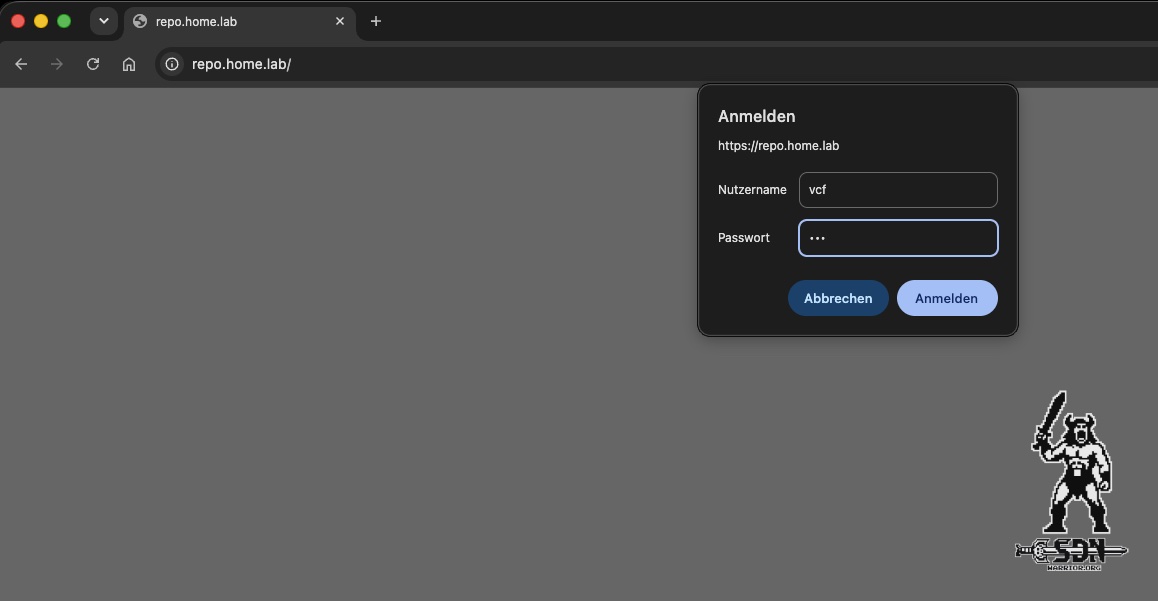
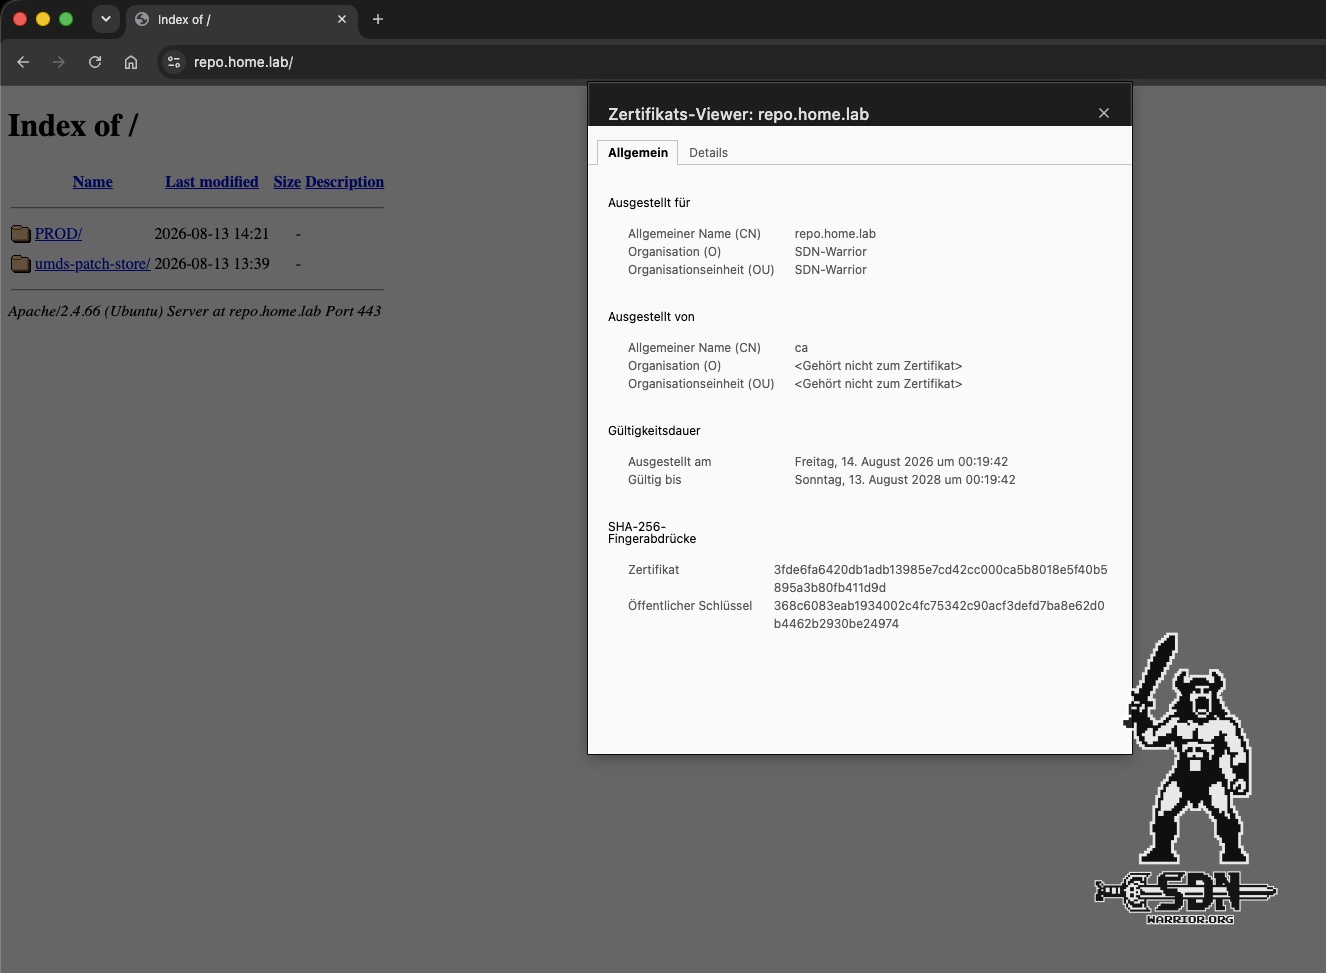
Well, that was easy. However, there’s still one problem: the VCF Installer won’t accept the certificate. Now you have two options: either import the repository certificate into the VCF Installer, or - like I normally do - use an NGINX proxy with Cert Manager. I have this service running on my NAS as a Docker container and use my local DNS server with split DNS. This way, my repository gets a valid Let’s Encrypt certificate via the proxy, and thanks to Cert Manager, I don’t have to deal with renewing Let’s Encrypt certificates. In most cases, this solution probably won’t be feasible - and let’s just say it’s more of a specialized solution for the SDN-Warrior Lab - so I’ll also show you how to configure the repository certificate in the VCF Installer, since unfortunately it can’t be done via the UI.
Importing the Repo Certificate
To do this, I first need to build a valid certificate chain. In my case, this means creating a cert.pem file in the /tmp directory on the VCF installer and copying the root CA certificate and the repository certificate into it to create a valid certificate chain. Then I import the certificate using the Java Keytool.
Between versions 9 and 9.1 of the VCF installer, the Java version was changed, so the keychains for the VCF 9.1 installer are located in a different directory (oh yeah, the fun with certificates—we love it).
For the 9.0 installer, use the following command:
keytool -import -trustcacerts -file /tmp/cert.pem -keystore /usr/lib/jvm/openjdk-java17-headless.x86_64/lib/security/cacerts -alias repo.home.lab -storepass changeit
For 9.1, please use this command:
keytool -import -trustcacerts -file /tmp/cert.pem -keystore /usr/lib/jvm/openjdk-java21-headless.x86_64/lib/security/cacerts -alias repo.home.lab -storepass changeit
After that, all you have to do is restart the services:
echo ‘y’ | /opt/vmware/vcf/operationsmanager/scripts/cli/sddcmanager_restart_services.sh
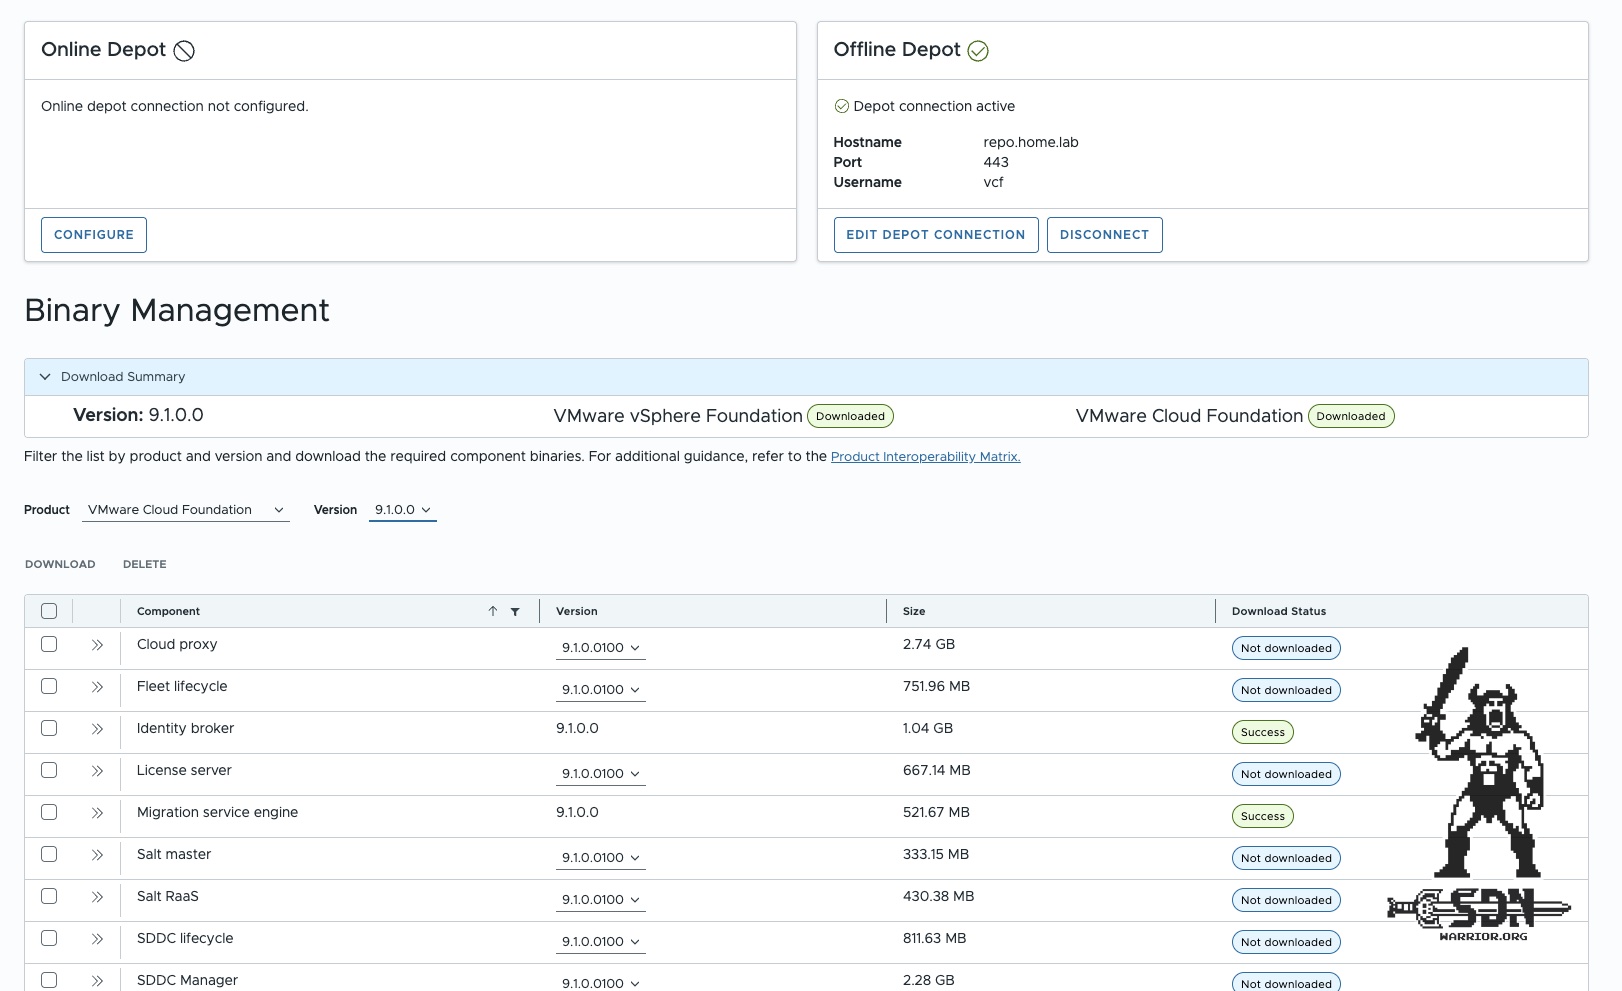
As a final step, you can now configure the offline repository in the VCF Installer.
Final words
It takes quite a bit of effort to get this up and running. If you want to make things easier on yourself, you should check out the VCF Infrastructure Services (VIS) Appliance for VCF 9.1 Lab/PoC by William Lam. It’s incredibly useful, but there might be the occasional situation in a consultant’s life where you can’t rely on an appliance like this. I don’t really understand why you can’t just accept the certificate in the installer via the UI, like with VCF Operations - that would make life a little easier. Well, in the end, building it was good for my rusty Linux skills, too. I hope this article helps you if you ever need to build a repository manually.